
Golf Stance Basics: A Complete Beginner’s Setup Guide

Quick Answer
A good golf stance gives you balance, room to turn, and a stable base for solid contact. Start with your feet about shoulder-width apart, soften your knees, bend from your hips, and let your arms hang naturally. This setup is one of the first skills to learn when you start playing golf.
Five Quick Setup Steps
- Set your feet: Use a narrower stance for short shots and a wider one for longer clubs.
- Build your posture: Bend from your hips while keeping your back comfortably straight.
- Soften your knees: Avoid sitting too low or locking your legs.
- Balance your pressure: Keep it around the middle of each foot, not in your toes or heels.
- Check alignment: Aim the clubface first, then set your feet parallel to the target line.
Fast Check
- You should feel stable enough to resist a light push without becoming tense.
Golf stance basics can look simple until you stand over a ball with several swing thoughts in your head. I’ve found that most poor setups begin with one small detail, such as cramped posture or incorrect ball position.
This guide explains how I build a repeatable stance for every main club. It also covers alignment, uneven lies, common mistakes, and useful practice drills.
In This Guide
What Is a Golf Stance, and Why Does It Matter?
A golf stance is the position of your feet and body as you prepare for and make a stroke. It includes stance width, posture, balance, alignment, and ball position.
Simple definition: Your golf stance is the balanced platform from which you swing the club.
Your stance does not hit the ball by itself. However, it controls how freely your hips, shoulders, arms, and club can move.
A balanced setup also makes your swing easier to repeat. That matters more than copying the exact pose of a tour player.
What a good stance helps you do
- Stay balanced: You can turn without falling toward your toes or heels.
- Reach the ball naturally: Your arms hang down instead of stretching or crowding your body.
- Control the low point: You can return the club to the correct part of the ground.
- Create useful power: Your feet provide support as your body rotates.
- Aim more consistently: Your clubface and body have clear reference lines.
I once spent a full practice session trying to stop thin iron shots. The swing felt wrong, yet the real problem was that I stood too far from the ball.
Moving about an inch closer let my arms hang naturally again. Contact improved without adding another swing thought.
Good stance versus a perfect-looking stance
Body shape, mobility, and club length affect how a stance looks. A tall golfer may bend differently from a shorter player while both remain well balanced.
Use the standard positions in this guide as starting points. Comfort, balance, and clean contact should decide your final setup.
The PGA of America’s posture drill is a useful reference if you need help finding a natural hip bend.
Section Takeaway: A sound stance supports balance, movement, and contact. Build a functional setup instead of forcing your body into a rigid pose.
How Do You Build the Correct Golf Stance?

Build your stance in a fixed order: clubface, feet, posture, arms, and balance. This routine reduces small changes that can cause large misses.
1. Aim the clubface before setting your feet
Stand behind the ball and choose a specific target. A tree, bunker edge, or section of the green gives you a clearer picture than “somewhere down the fairway.”
Find a small mark a few feet ahead of the ball on your target line. Place the clubface square to that nearer mark.
2. Choose the correct stance width
For a middle iron, place the inside edges of your feet near shoulder width. Your exact width may change with your build and flexibility.
A wide stance feels powerful but can restrict hip movement. A narrow stance improves rotation but may reduce stability.
- Driver: Slightly wider than shoulder width.
- Middle iron: Around shoulder width.
- Wedge: Slightly narrower than shoulder width.
- Putter: Comfortable and stable, often about hip width.
3. Bend from your hips
Stand tall and push your hips gently backward. Let your upper body tilt forward while keeping your spine comfortably long.
Do not round your shoulders toward the ball. Avoid forcing your lower back into an exaggerated arch.
4. Add a small amount of knee flex
Unlock your knees after bending from the hips. You should feel athletic, but not as though you are sitting in a chair.
Too much knee flex lowers your hands and traps your hips. Locked legs create tension and make balance harder.
5. Let your arms hang naturally
Your arms should fall beneath your shoulders with little tension. From there, bring your hands together on the grip.
If you must reach, you may be too far from the ball. If your elbows feel trapped, step back slightly.
6. Check your balance
Feel pressure through the middle of each foot. Your heels and the balls of your feet should both remain connected to the ground.
Try lifting your toes briefly before the swing. If that feels impossible, your pressure may be too far forward.
A simple pre-shot stance checklist
- Choose the target and intended ball flight.
- Aim the clubface at a nearby reference point.
- Set the correct ball position.
- Place your feet at the needed width.
- Bend from the hips and soften your knees.
- Check your balance, then swing.
Keep this routine short on the course. I prefer one posture check and one target look before starting the club back.
Pro tip: If your posture causes back, hip, or knee pain, stop and consult a medical professional. A certified PGA instructor can then help adapt the setup to your mobility.
Section Takeaway: Build your stance in the same order before every shot. A repeatable routine makes alignment and posture easier to control.
How Should Your Stance Change for Each Club?
Your stance should change as the club becomes longer or the intended shot changes. The basic posture stays similar, but width and ball position move.
If you are still learning the purpose of each club, this guide to the main types of golf clubs explains how they differ.
| Club or Shot | Starting Stance Width | Ball Position | Setup Purpose |
|---|---|---|---|
| Driver | Slightly wider than shoulders | Inside the lead heel | Stable base and forward strike location |
| Fairway wood or hybrid | Around shoulder width | One to two balls forward of center | Sweeping strike with room to turn |
| Middle iron | Around shoulder width | Center to one ball forward | Ball-first contact followed by turf |
| Wedge | Slightly narrower than shoulders | Near the center | Control and predictable low point |
| Putter | Comfortable, often hip width | Near center or slightly forward | Stable eyes and quiet lower body |
These positions are practical baselines, not fixed laws. Test small changes while watching strike quality and start direction.
Driver stance
A driver needs your widest full-swing stance. Place the ball near the inside of your lead heel and tilt your trail shoulder slightly lower.
This setup helps you meet a teed ball later in the swing arc. My driver contact becomes unreliable when I move the ball too close to center.
Keep the width comfortable enough to finish in balance. The wider setup described in this beginner’s driver guide should support rotation, not block it.
Iron stance
Use a shoulder-width stance for most middle irons. Position the ball near center or about one ball forward of center.
Short irons can move closer to center. Longer irons usually work better a little farther forward.
Your pressure should feel balanced at address. The goal is a descending strike, which means contacting the ball before the turf.
You can learn more about loft and normal iron use in this golf iron explanation.
Wedge stance
A narrower stance helps control short wedge shots. Start with the ball near center and place slightly more pressure on your lead foot.
Do not push the ball far back unless you want a lower flight. That position can create a steep strike and excessive digging.
Different loft and bounce options affect turf interaction. This guide to golf wedge types and setup explains those terms.
Putting stance
A putting stance should keep your head and lower body stable. Use a width that lets your shoulders move without swaying.
Position the ball near center or slightly forward. Let your eyes sit over the ball or just inside its line.
Blade and mallet shapes may encourage different visual preferences. The stance principles remain the same across the main putter types.
Section Takeaway: Longer clubs usually need a wider stance and a more forward ball position. Shorter clubs favor a narrower, control-focused setup.


Where Should the Ball and Body Be Aimed?
Aim the clubface at the intended starting line. Set your feet, knees, hips, and shoulders roughly parallel to that line.
This often feels as though your body points left of the target for a right-handed golfer. Left-handed players see the opposite picture.
Target line versus body line
The target line runs from the ball toward your chosen target. Your body line runs parallel to it, like the second rail of a train track.
A common beginner mistake is aiming both lines directly at the target. This can send the clubface right while the body compensates left.
- Clubface: Aim it along the intended starting line.
- Feet: Set them parallel to the target line.
- Knees: Keep them close to the foot line.
- Hips: Start square unless the shot requires another setup.
- Shoulders: Check them carefully because they often aim left.
How to check alignment during practice
Lay one alignment rod just outside the ball, pointing at the target. Place another parallel to it near your toes.
The PGA’s alignment-stick drills provide several clear ways to practice these lines.
Use rods only on the practice range. As of 2026, USGA Rule clarifications state that you cannot set down an object to help take your stance during a round.
How ball position changes contact
Moving the ball forward gives the club more time to travel upward and around your body. Moving it back tends to produce an earlier, steeper strike.
Neither change automatically fixes a slice, hook, thin shot, or fat shot. Ball position is one part of the swing’s impact conditions.
During practice, move the ball only half a ball-width at a time. Larger changes can hide the relationship between setup and contact.
Section Takeaway: Aim the clubface first and build parallel body lines around it. Use practice rods to train your eyes, but remove them before playing.
How Do You Adjust Your Stance for Different Lies?
Uneven ground changes balance, club delivery, and the ball’s likely flight. Adjust your stance before changing your swing.
Ball above your feet
Stand a little taller because the ball sits closer to you. Grip down if needed and expect the ball to curve toward your body side.
For a right-handed golfer, that often means a draw or pull left. Aim with that tendency in mind.
Ball below your feet
Use more knee flex and keep your chest down through impact. Choose enough club so you do not need a violent swing.
The ball often curves away from your body side. Right-handed players may see a fade or push to the right.
Uphill lie
Match your shoulder line to the slope and place slightly more pressure on the lower foot. The slope adds effective loft to the shot.
The ball may fly higher and shorter. Consider using one more club than the normal yardage suggests.
Downhill lie
Set your shoulders closer to the angle of the slope. Keep more pressure on the lower foot and use a controlled swing.
A downhill lie reduces effective loft. Expect a lower flight with extra roll after landing.
Rough and bunker adjustments
In thick rough, widen your stance slightly and hold the club firmly. Do not assume the clubface will move cleanly through long grass.
A greenside bunker normally needs a wider, lower stance with the feet planted into the sand. The wider base helps you stay stable while the club enters behind the ball.
Course conditions may limit how you create that stance. The R&A’s Rule 10 guidance also explains restrictions involving alignment help and certain positions across the line of play.
Pro tip: Uneven lies place different loads on your ankles, knees, hips, and back. Ask a certified instructor for hands-on help if any setup feels unstable or painful.
Section Takeaway: Match your body to the slope and protect your balance first. Then account for the likely change in launch, curve, and distance.
Which Golf Stance Mistakes Should Beginners Fix?
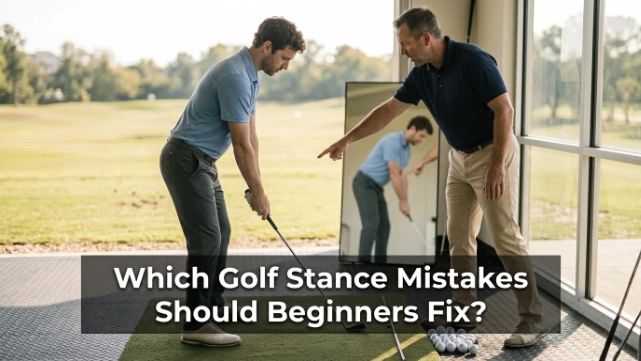
The most common stance mistakes involve distance from the ball, poor balance, and weak alignment. Fix one variable at a time.
Standing too far from the ball
Reaching creates tension in the arms and shoulders. It can also pull your pressure toward your toes.
Let your arms hang before taking the grip. Your hands should not feel as though they are chasing the club.
Standing too close
A crowded setup gives your hands little room to pass your legs. Golfers often stand up during the downswing to create space.
Move back in small steps. Stop when your arms hang freely without losing balance.
Using one stance width for every club
A driver and a short wedge have different speed and control needs. Using the same wide base for both can limit wedge rotation.
Build a simple width ladder. Use narrow for putting and short shots, medium for irons, and wide for the driver.
Putting too much pressure in the toes
Toe-heavy pressure makes it easy to fall toward the ball. Heel-heavy pressure can pull you away from it.
Feel the ground under your entire foot. You should remain stable when turning in either direction.
Bending mainly from the knees
Excess knee bend pushes your hips under your torso. Your hands then sit too low and close to your legs.
Begin with the hip hinge. Add only enough knee flex to feel mobile.
Simple drills that improve your stance
- Mirror drill: Check your hip bend, knee flex, and shoulder position without hitting balls.
- Club-across-hips drill: Hold a club across your hips and practice turning without swaying.
- Balance drill: Make half-swings while keeping both feet grounded through impact.
- Progressive-width drill: Hit wedges, irons, and drivers while changing stance width for each club.
- Foot-line drill: Place a rod near your toes to learn what parallel alignment looks like.
I like to hit five balls with each setup before making a change. One strike can mislead you, while a small group reveals a pattern.
Record a front and down-the-line video at normal speed. Check setup first instead of judging every part of the swing.
A good checkpoint is whether your stance lets you finish facing the target without stepping or falling. If balance disappears, reduce speed and rebuild the setup.
You can also use the PGA Coach directory when a persistent contact problem needs trained eyes.
Section Takeaway: Most beginners improve faster by fixing balance, distance, and alignment before changing their swing. Practice one setup variable across several shots.
Golf Stance Basics FAQ
How wide should a beginner’s golf stance be?
Start around shoulder width for a middle iron. Use a slightly wider stance for the driver and a narrower one for wedges, chips, and putts.
Should my feet be square in a golf stance?
Square feet are a useful starting point. Turning the lead foot out slightly may improve hip rotation, while some golfers flare both feet for comfort and mobility.
Where should my weight be at address?
For a standard full shot, begin with balanced pressure between both feet and through the middle of each foot. Driver and wedge setups may use small pressure changes for the intended strike.
Should my knees be bent during a golf swing?
Your knees should remain softly flexed at address. Avoid deep squatting or locked legs because both positions can restrict movement and disturb balance.
How far should I stand from the golf ball?
Stand close enough for your arms to hang naturally beneath your shoulders. You should not reach for the ball or feel your hands trapped against your legs.
Does ball position change for every golf club?
Yes. Drivers usually sit near the lead heel, irons move gradually toward center, and wedges sit near center for a standard shot.
Can a poor stance cause a slice?
A poor stance can contribute to a slice through open alignment, poor balance, or incorrect ball position. However, the clubface and swing path at impact ultimately create the ball’s starting direction and curve.
Final takeaway: Start with balance, natural posture, and clear alignment. Make small stance changes for each club, then judge them by comfort, contact, and your ability to finish under control.
Practice the setup before chasing complex swing fixes. A dependable stance gives every other part of your golf swing a better chance to work.