
Grip Drill 1: A Simple Golf Grip Drill for Better Control

Quick Answer
Grip Drill 1 is a simple way to build a repeatable golf grip before worrying about the full swing. Place the club through the fingers of your lead hand, add the trail hand so both hands work together, use light-to-moderate pressure, then rehearse the setup several times before hitting short shots. The PGA of America grip guide also explains how hand position can affect the clubface and wrist action.
Grip Drill 1 in five steps
- Square the club: Hold the club in front of you with the clubface in a neutral position.
- Add the lead hand: Run the handle diagonally through the fingers instead of burying it deep in the palm.
- Close the hand: Wrap your fingers around the grip without squeezing as hard as possible.
- Add the trail hand: Fit it against the lead hand so the two hands feel connected.
- Rehearse first: Build and release the grip several times before hitting easy half shots.
Best check
- The club should feel secure without creating tension through your hands, wrists, and forearms.
I treat Grip Drill 1 as the first grip exercise I use when my setup starts feeling inconsistent. It is simple on purpose.
There is no single universal golf drill officially named “Grip Drill 1.” In this guide, the term means a basic grip-building drill that helps you place both hands on the club the same way each time.
In This Guide
What Is Grip Drill 1 in Golf?
Grip Drill 1 is a basic hand-placement exercise designed to make your golf grip easier to repeat. You build the grip slowly, check your hand positions, release the club, and repeat.
Definition: A golf grip is both the handle covering on the club and the way a golfer places the hands around that handle. In this drill, “grip” refers mainly to your hand position and connection.
I like starting here because the grip is one of the few swing fundamentals you can inspect before the club moves. You do not need a launch monitor or a bucket of balls.
Your hands influence how easily your wrists move and how the clubface behaves during the swing. A grip that changes every shot adds another variable before you even start the takeaway.
- Goal one: Place the lead hand consistently.
- Goal two: Connect the trail hand without fighting the lead hand.
- Goal three: Hold the club securely without excessive tension.
- Goal four: Repeat the same setup without staring at your hands for several seconds.
As of 2026, those fundamentals remain more useful to me than chasing a fashionable grip position. The best grip is repeatable and fits the ball flight you are trying to produce.
The USGA equipment rules for grips deal with the physical club grip itself. They are worth knowing if you use shaped or training-style grip aids.
Section Takeaway: Grip Drill 1 is about consistency first. Build a grip you can repeat before trying to change your swing around it.
How Do You Do Grip Drill 1?
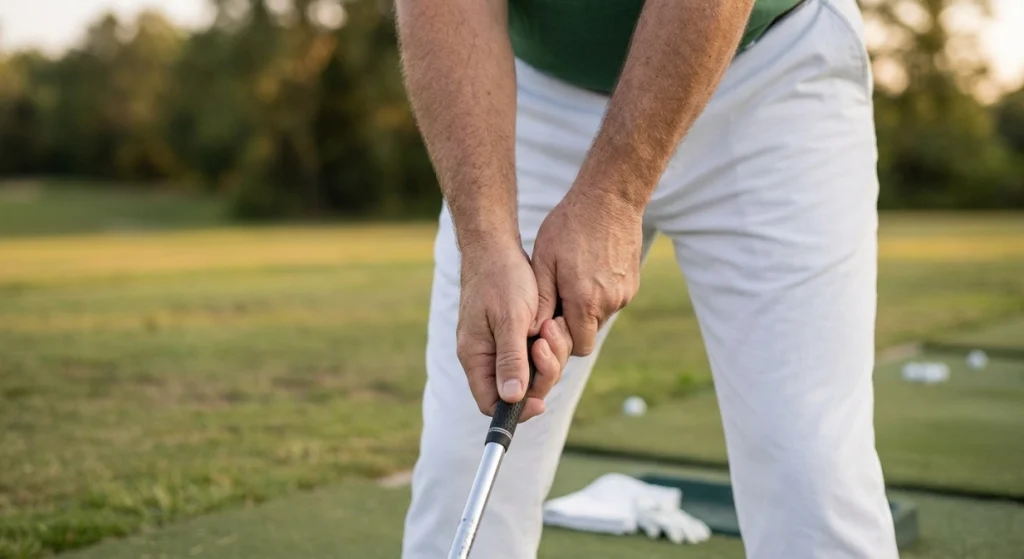
Start with the club in front of you, build the lead-hand position first, add the trail hand, then repeat the complete process several times. Do the drill slowly before adding speed.
Step 1: Start with a neutral clubface
Hold the club in front of your body at a comfortable angle. Keep the clubface looking square rather than noticeably twisted open or closed.
This gives you a clean reference point. If the face starts crooked, judging your hand position becomes harder.
Step 2: Place the lead hand on the club
For a right-handed player, the lead hand is the left hand. For a left-handed player, reverse the instructions.
Let the handle run diagonally through the fingers and toward the heel pad of the hand. Avoid placing the entire handle deep across the middle of the palm.
- Wrap the last three fingers around the handle.
- Let the thumb rest naturally along the grip.
- Keep the wrist comfortable rather than forced.
- Check that the club feels supported by the fingers.
When I rehearse this, I pay more attention to security than to copying an exact photograph. Hand size and mobility differ from golfer to golfer.
Step 3: Add the trail hand
Bring the trail hand toward the side of the lead thumb. Let the fingers wrap around the grip while the hands stay close together.
The trail hand should not feel like a separate motor trying to overpower the lead hand. I want both hands to feel like one unit.
Step 4: Check your pressure
Hold the club tightly enough that it will not slip during a swing. Do not squeeze until your forearms become rigid.
A pressure scale can become too artificial, so I prefer a simpler test. Wiggle your fingers slightly, then make a small wrist hinge without losing control of the club.
If that feels impossible, you may be squeezing too hard.
Step 5: Release and rebuild the grip
Take both hands off the club. Then build the grip again from the beginning.
- Complete five slow grip repetitions without swinging.
- Complete five more while looking at a target rather than your hands.
- Make several waist-high rehearsal swings.
- Finish with easy half shots before moving to full swings.
I find this more useful than hitting full drivers immediately. A small shot lets me notice whether the grip still feels organized once the club starts moving.
Pro tip: If changing your grip causes pain, major ball-flight problems, or an awkward wrist position, work with a certified PGA professional or qualified club fitter rather than forcing the position.
Section Takeaway: Build the grip slowly, release it, and rebuild it. Repetition teaches the setup better than one long inspection.
What Should a Correct Golf Grip Feel Like?
A useful golf grip should feel secure, connected, and mobile. You should control the club without creating unnecessary tension in your wrists and forearms.
I use three simple checks whenever my grip feels strange.
- Security: The club does not feel as if it will twist or slide during a normal swing.
- Connection: The lead and trail hands feel like they can move together.
- Mobility: The wrists can still hinge without feeling locked.
Do not confuse a neutral grip with a perfect grip for every golfer. Some players naturally use a slightly stronger or weaker hand position.
A “strong” grip usually means the hands are rotated more toward the trail side. A “weak” grip means they are rotated more toward the lead side.
Those words describe orientation, not how hard you squeeze.
Use ball flight as feedback
Your grip is not the only factor controlling ball flight. Swing path, clubface angle, strike location, and impact conditions also matter.
Still, a sudden grip change can alter how the clubface returns to the ball. That is why I change one thing at a time.
- Repeated shots starting right may involve an open face for a right-handed golfer.
- Repeated shots starting left may involve a closed face.
- Curving shots can involve both face angle and swing path.
- Inconsistent contact may come from several setup or swing factors.
Do not keep rotating your hands after every bad shot. Look for a pattern over several swings first.

Overlap vs Interlock vs 10-Finger Grip
Overlap, interlock, and 10-finger grips are three common ways to connect the hands. None is automatically correct for every golfer.
The PGA discusses these common connection methods in its grip instruction. I suggest testing them at low speed before deciding which feels most natural.
| Grip Style | How the Hands Connect | What You May Notice |
|---|---|---|
| Overlap | The trail-hand little finger rests over the lead hand. | A connected feel without locking the fingers together. |
| Interlock | The trail little finger and lead index finger interlock. | A tighter physical connection between the hands. |
| 10-finger | All ten fingers remain on the club without overlap or interlock. | A simple setup that some beginners and golfers with smaller hands find comfortable. |
Which one should you use for Grip Drill 1?
Use the connection that lets you repeat your hand position without discomfort. Then keep that style constant while practicing the drill.
I would not switch between all three during the same ball-striking session. That makes it difficult to learn what changed.
Practice swings are different. Testing each style without hitting balls can help you compare comfort and mobility.
Pro tip: A PGA instructor can check whether your grip style fits your hand size, wrist mobility, and normal ball flight.
What Mistakes Should You Avoid?
The biggest Grip Drill 1 mistakes are gripping too tightly, changing too many things, and rushing into full swings. Each one makes useful feedback harder to recognize.
Holding the club too much in the palm
A grip buried deep in the palm can make wrist movement feel restricted. The club should normally have meaningful contact with the fingers.
Squeezing harder after a bad shot
This is one mistake I watch for in my own practice. A poor strike can make me instinctively tighten both hands on the next swing.
That reaction adds tension without identifying the original problem.
Rotating both hands after every miss
Do not chase individual shots. One push or hook does not prove your grip is wrong.
Hit a small group of controlled shots and look for repeated patterns.
Ignoring the clubface before taking the grip
If you grip a club with the face already twisted, your hands may look different when you return it to square. Start from the same face position each time.
Using a training grip without checking the rules
Molded training grips can provide clear hand-placement feedback during practice. However, some training-style grips may not meet equipment requirements for normal competitive play.
If you plan to use an unusual grip in competition, check the current rules through the R&A or USGA rather than assuming it is conforming.
Trying to make the grip look perfect
Your hands do not need to copy another golfer exactly. Finger length, hand size, flexibility, and preferred shot shape all affect what feels comfortable.
The better question is whether your grip is repeatable and supports predictable contact.
Section Takeaway: Do not judge your grip by appearance alone. Judge it by repeatability, comfort, club control, and consistent shot patterns.
How Often Should You Practice Grip Drill 1?
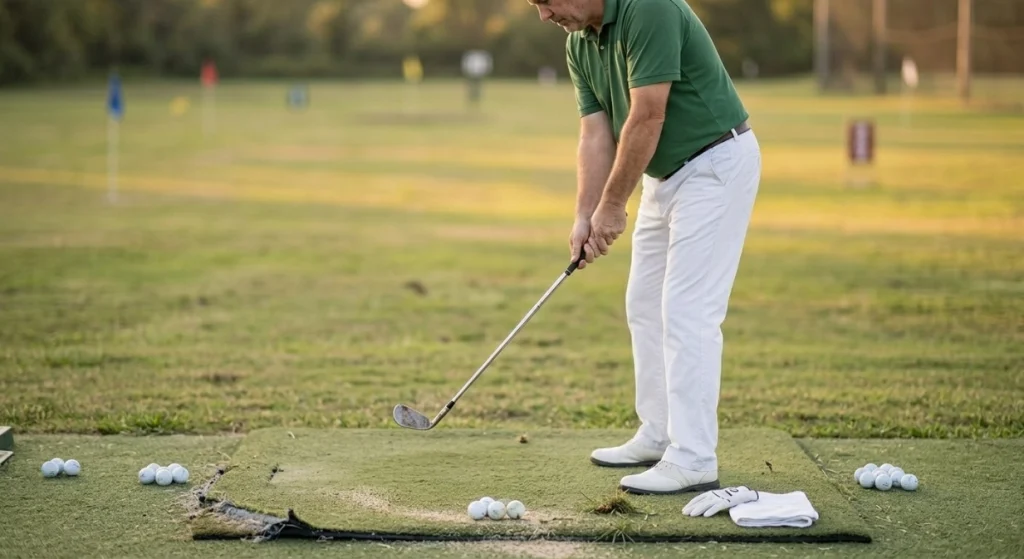
Short, frequent grip practice is more useful than rebuilding your grip only when your swing breaks down. You can perform Grip Drill 1 at home without hitting a ball.
I like separating grip practice from normal range practice. It lets me focus on one skill without caring where a shot goes.
A simple practice routine
- Five slow repetitions: Watch your hands and check each stage.
- Five target-focused repetitions: Build the grip while looking mostly ahead.
- Five small rehearsals: Make waist-high swings without a ball.
- Five short shots: Use a wedge or short iron at comfortable speed.
- Normal practice: Move to fuller swings only when the grip feels automatic.
The number five is not a performance formula. It simply keeps each part of the drill short enough to maintain attention.
Practice it when your grip feels normal too
Many golfers only work on fundamentals after poor rounds. I think that makes basic practice feel like emergency repair.
Grip Drill 1 works well as a warm-up because you can complete it before hitting your first full shot.
Do not make major changes before an important round
A different grip can change the way the clubface feels throughout your swing. Give yourself practice time before relying on a large adjustment on the course.
If your current grip is comfortable and your ball flight is predictable, a dramatic change may not be necessary.
Section Takeaway: Practice Grip Drill 1 in small doses. The goal is to make your grip automatic, not to think about your hands during every swing.
Frequently Asked Questions
What is Grip Drill 1?
Grip Drill 1 is a basic golf practice exercise where you build your lead-hand and trail-hand positions, remove your hands, and repeat the process. The goal is a secure, comfortable, and repeatable grip before adding full swing speed.
Is Grip Drill 1 only for beginners?
No. Beginners can use it to learn hand placement, while experienced golfers can use it as a fundamentals check. I find simple setup drills especially useful when the swing starts feeling more complicated than it needs to be.
How hard should I hold a golf club?
Hold it firmly enough that the club stays controlled but not so tightly that your wrists and forearms become rigid. You should still be able to make a comfortable wrist hinge while keeping the club secure.
Should I use an interlocking or overlapping grip?
Both can work. An interlocking grip physically links two fingers, while an overlapping grip places the trail little finger over the lead hand. Test both at low speed and choose the one that feels comfortable and repeatable.
Can a golf grip cause a slice?
Grip position can influence clubface behavior, but it is not the only cause of a slice. Swing path, face angle, strike location, and setup also matter, so look for a consistent pattern before changing your hands.
Can I practice Grip Drill 1 at home?
Yes. You can build and release your grip repeatedly without hitting a ball. Make sure you have enough clear space before adding rehearsal swings, and avoid swinging near people, furniture, windows, or low ceilings.
Should I use a molded training grip?
A training grip can help you feel specific hand positions during practice. However, molded training-style grips may not conform to equipment rules for competition, so check current USGA or R&A guidance before playing a regulated event with one.
Final takeaway: Grip Drill 1 works because it removes speed and complexity from the problem. Build the grip, check the connection, release it, and repeat until placing your hands on the club feels natural. Then take that same feel into short shots before moving to full swings.
If your grip still feels uncomfortable or causes a persistent ball-flight problem, have a qualified instructor check it in person. A small adjustment that fits your hands is often more useful than copying someone else’s grip exactly.