
Trail Hand Grip in Golf: How to Place Your Hand Correctly

Quick Answer
A good trail hand grip places the club mainly through the fingers, with the trail palm covering the lead thumb. For a neutral starting point, bring the hand onto the club from the side instead of underneath, similar to the PGA’s handshake-style grip checkpoint.
Check these trail hand positions
- Use the fingers: Let the handle run across the middle joints instead of sitting deep in your palm.
- Cover the lead thumb: The lifeline area of your trail palm should sit over the lead thumb.
- Come from the side: Avoid sliding the hand far underneath the handle.
- Check the V: The V between your trail thumb and index finger can point roughly between your chin and trail shoulder as a neutral reference.
- Stay relaxed: Hold the club securely without squeezing so hard that your wrists and forearms become rigid.
For left-handed golfers
- Your trail hand is your left hand, so simply reverse the right-handed directions in this guide.
The trail hand grip is easy to overlook because the lead hand normally goes on the club first. Yet the trail hand can strongly affect how the clubface feels and moves during the swing.
I like to treat the right-hand grip for a right-handed golfer as a support system, not a power move. When it sits naturally on the handle, the two hands can work together instead of fighting each other.
In This Guide
- What is the trail hand grip in golf?
- How should you place your trail hand on the golf club?
- Should your trail hand grip be strong, neutral, or weak?
- How much trail hand grip pressure should you use?
- What trail hand grip mistakes cause problems?
- How can you practice a better trail hand grip?
- Trail Hand Grip FAQ
What Is the Trail Hand Grip in Golf?
The trail hand grip describes how your trailing hand sits on the handle. That’s your right hand for a right-handed golfer and your left hand for a left-handed golfer.
Definition: Your trail hand is the hand positioned lower on the golf club when you use a standard two-handed grip.
The trail hand helps support the handle and connects with the lead hand. Its position also influences how easy it feels to control the clubface.
That doesn’t mean one trail hand position works for every golfer. Body structure, wrist motion, release pattern, and swing tendencies can change what feels functional.
Why does the trail hand matter?
I pay close attention to it when a golfer’s clubface seems difficult to control. A hand sitting far underneath the club can behave quite differently from one placed more on top.
- Clubface control: Hand orientation can influence how naturally the face opens and closes.
- Wrist movement: Trail wrist motion becomes easier or harder depending on how the hand starts.
- Contact: A balanced grip can make centered strikes easier to repeat.
- Comfort: The hands should work as one unit without excessive tension.
The term “grip” can also mean the rubber or synthetic material installed on the shaft. The USGA Equipment Rules use the word in that equipment sense.
In this guide, I’m talking about hand placement. That’s the part you can adjust during setup.
Section Takeaway: Your trail hand supports the club and helps organize the clubface. Start with a comfortable, neutral position before making stronger adjustments.
How Should You Place Your Trail Hand on the Golf Club?
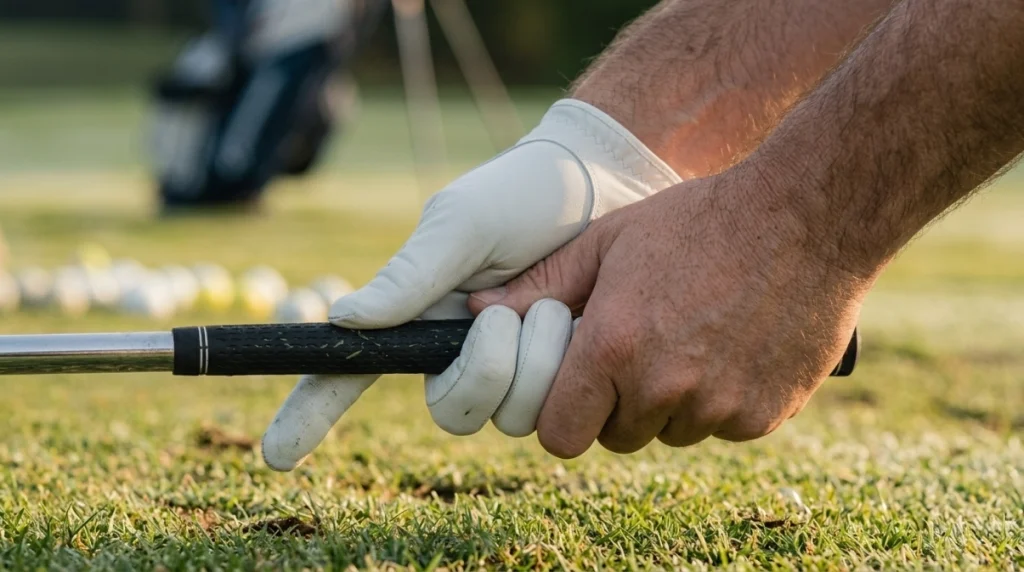
Start by placing the club through the fingers of your trail hand. Then close the hand so the palm fits over the lead thumb.
I find this easier when I build the grip slowly away from the ball. Trying to fix it while standing over a shot often leads to rushed hand placement.
Step 1: Set your lead hand first
Place your lead hand on the club in its normal position. Your trail hand needs a stable lead-hand position to match.
Step 2: Bring the trail hand from the side
Move your open trail hand toward the handle as if you’re about to shake hands with it. Avoid scooping your palm underneath the shaft.
Step 3: Let the handle cross your fingers
The handle should sit more through the fingers than deep across the center of your palm. This allows the wrist and fingers to support the club without excessive tension.
- Rest the handle diagonally across the middle joints of your trail-hand fingers.
- Wrap the middle fingers around the underside of the handle.
- Place the palm’s lifeline area over the lead thumb.
- Let the trail thumb rest naturally rather than pressing straight down.
- Check that both hands feel connected.
Step 4: Check the V between your thumb and index finger
For a neutral starting point, the V can point somewhere between your chin and trail shoulder. Treat this as a checkpoint, not an absolute law.
The Golf Digest basic grip checklist also emphasizes keeping the trail hand in the fingers. That’s one of the first things I check when a golfer’s grip feels unstable.
Step 5: Choose how the hands connect
You can connect your hands with an overlap, interlock, or ten-finger grip. The basic trail-hand relationship stays similar with each method.
- Overlap grip: The trail pinky rests over the lead index-finger area.
- Interlock grip: The trail pinky and lead index finger interlock.
- Ten-finger grip: All ten fingers remain on the club.
None of those options automatically gives you better technique. Pick the connection that lets your hands feel secure without strain.
Section Takeaway: Place the trail hand mainly in the fingers, cover the lead thumb, and bring the hand onto the club from the side.
Should Your Trail Hand Grip Be Strong, Neutral, or Weak?
A neutral trail hand is the simplest starting point for most golfers. Stronger or weaker positions can work, but they usually need to match the rest of your swing.
“Strong” and “weak” describe hand rotation around the handle. They don’t describe how tightly you squeeze the club.
| Trail Hand Position | What It Looks Like | Typical Tendency | Best Use |
|---|---|---|---|
| Neutral | Hand sits mostly on the side of the handle. | Balanced starting point for clubface control. | Good baseline for most golfers. |
| Strong | Trail hand rotates farther underneath. | Can encourage the face to close sooner for some players. | May suit specific release patterns or open-face tendencies. |
| Weak | Trail hand rotates more toward the top. | Can make face rotation feel slower for some players. | May suit golfers who close the face too quickly. |
Those are tendencies, not guarantees. A golfer’s wrist angles, body rotation, club path, and release also affect the face.
What does an overly strong trail hand look like?
The trail palm usually rotates well underneath the handle. You may also see the V pointing farther toward or beyond the trail shoulder.
Golf Digest’s trail-hand grip guidance warns that bringing the hand too far from underneath can contribute to a shut clubface and low-left shots for some golfers.
What about a weak trail hand?
A weak position places more of the trail hand on top of the handle. Some golfers feel that this makes it harder to release the clubface.
I wouldn’t change grip strength based on one bad shot. First look for a repeated pattern across several swings.
Section Takeaway: Neutral is a useful baseline, but your best trail hand position must match your natural wrist motion and ball-flight pattern.


How Much Trail Hand Grip Pressure Should You Use?
Your trail hand should hold the club firmly enough to prevent unwanted movement. It shouldn’t squeeze so hard that your wrists and forearms become rigid.
I use a simple test. If I can feel the handle securely while still moving my wrists freely, the pressure is usually close.
Where should you feel the pressure?
Most of the useful trail-hand contact comes from the fingers. The middle fingers can provide support while the palm stays connected to the lead thumb.
- Middle fingers: Keep secure contact with the handle.
- Palm lifeline: Maintain contact over the lead thumb.
- Thumb and index finger: Avoid pinching the shaft aggressively.
- Forearm: Keep enough softness to move naturally.
Why is squeezing with the trail hand a problem?
A death grip often creates forearm tension. That can make the club feel harder to swing and harder to release naturally.
The opposite problem also exists. Holding the club too loosely can let the handle shift during the swing.
Pressure also changes dynamically as you swing, so don’t chase a perfect number. Focus on secure contact without unnecessary tension.
Section Takeaway: Secure the handle mainly with your fingers and avoid a trail hand that feels either limp or rigid.
What Trail Hand Grip Mistakes Cause Problems?
The biggest mistakes usually come from hand orientation, palm placement, or excess tension. I check these before making larger swing changes.
1. Putting the trail hand too far underneath
This creates an overly strong position for many golfers. It can make the clubface want to close faster through impact.
2. Holding the club deep in the palm
A palm-heavy grip can restrict natural wrist motion. It can also make the club feel less responsive.
3. Leaving a gap between the hands
The trail palm should connect with the lead thumb. A large gap can make the hands feel like two separate units.
4. Pressing the trail thumb straight down
The thumb doesn’t need to dominate the grip. Excess pressure there can create tension through the hand and forearm.
5. Changing the grip to fix every bad shot
A pull, hook, push, or slice can come from several swing factors. Grip matters, but it isn’t the only cause.
- Check your clubface first.
- Look at your starting direction.
- Watch the ball’s curve.
- Check contact on the clubface.
- Then decide whether the grip needs adjustment.
That process keeps you from chasing random fixes. I’ve seen golfers create a new problem because they changed a reasonable grip after one poor range session.
Section Takeaway: Correct obvious grip faults first, but don’t assume every ball-flight problem starts in your hands.
How Can You Practice a Better Trail Hand Grip?
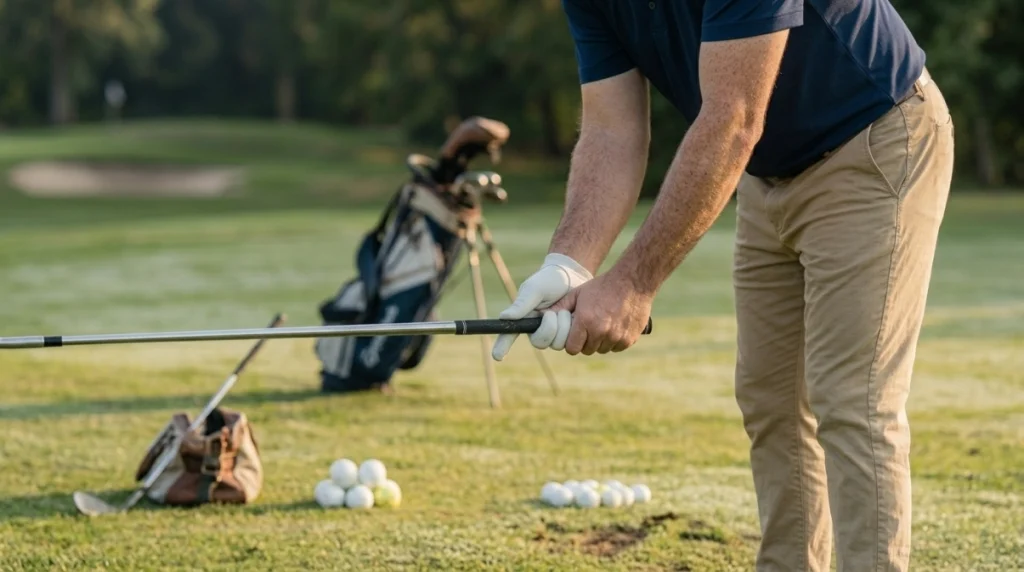
Practice the grip away from the golf ball before trying to hit full shots. Repetition makes the new hand position feel normal much faster.
Use the handshake drill
- Hold the club with your lead hand.
- Let your trail arm hang naturally.
- Bring the trail hand toward the handle from the side.
- Imagine shaking hands with the club.
- Close your fingers around the handle.
Do this ten times without hitting a ball. Look at the hand position after each repetition.
Try the lead-thumb coverage check
Build your normal grip and look at where the trail palm sits. The fleshy lifeline area should cover the lead thumb rather than separating from it.
Hit short shots before full swings
Start with small pitch shots after changing your grip. That gives you time to feel the clubface without adding full-swing speed.
- Hit five short pitches.
- Move to five half swings.
- Check your grip before each shot.
- Only move to full swings when the position feels repeatable.
Use your ball flight as feedback
Watch the starting line and curve instead of judging the grip by appearance alone. A textbook-looking hand position isn’t useful if it fights your natural motion.
As of 2026, modern instruction still treats trail-hand position as an individual fit within basic fundamentals. Neutral checkpoints give you a baseline, not a mandatory final position.
Pro tip: If a grip change causes wrist, hand, or elbow discomfort, stop forcing it and work with a PGA professional or qualified club fitter.
Section Takeaway: Rehearse the grip slowly, test it with short shots, and let repeated ball flight guide any further adjustment.
Trail Hand Grip FAQ
Which hand is the trail hand in golf?
The trail hand is the hand lower on the club. It is the right hand for a right-handed golfer and the left hand for a left-handed golfer.
Should the trail hand be in the fingers or palm?
The handle should generally sit more through the fingers than deep in the palm. This helps you maintain secure contact while allowing natural wrist movement.
Should the trail palm cover the lead thumb?
Yes, that is a useful standard checkpoint. The lifeline area of the trail palm normally rests over the lead thumb so the hands feel connected.
Where should the trail-hand V point?
A neutral reference is for the V between the trail thumb and index finger to point roughly between your chin and trail shoulder. Your ideal position may vary with your natural swing.
Can a strong trail hand cause a hook?
An excessively strong trail hand can encourage faster clubface closure for some golfers, which may contribute to hooks or pulls. Club path, wrist action, and body rotation also influence the shot.
Can a weak trail hand cause a slice?
A weak trail hand may make face closure harder for some players, which can contribute to an open face. However, slices also depend heavily on club path and impact conditions.
Should I use my trail hand for power?
The trail arm and hand contribute to the swing, but trying to hit the ball by aggressively throwing the trail hand can hurt consistency. I prefer to feel both hands supporting one coordinated motion.
Final takeaway: Start with a neutral trail hand grip in the fingers, cover the lead thumb, and keep your pressure secure but comfortable. Test any adjustment with real ball flight before making it permanent.
If your current grip keeps producing the same miss, work on the trail hand at slow speed first. A small setup change can be much easier to repeat than a complicated mid-swing correction.