
Golf Green Explained: Rules, Design, Speed, Etiquette, and Putting Basics

The putting green can feel like the simplest part of a golf hole: roll the ball into the cup and move on. In reality, its slopes, grass, firmness, speed, and surrounding hazards can turn a short putt into a difficult challenge.
This Golf Green Explained guide covers what a golf green is, how it is maintained, how to read its surface, which rules apply, and how golfers should behave while using it. You will also learn practical ways to improve your putting without relying on expensive equipment or complicated techniques.
Quick Answer
A golf green is the closely mown area around the hole that is specially prepared for putting. Golfers may mark, lift, clean, and replace their ball on this surface. Green speed, slope, grain, moisture, and firmness influence how a putt rolls, so careful reading and proper pace control are essential.
What Is a Golf Green?

A golf green, officially called a putting green, is the specially prepared area containing the hole you are playing. Its grass is normally cut much shorter than the fairway so a golf ball can roll smoothly across the surface.
The green is one of the five defined areas of a golf course under the Rules of Golf. It receives special treatment because golfers are allowed to mark, lift, clean, and replace their balls there. The official USGA putting green guidance explains these permissions and the basic rules that apply once a ball reaches the surface. (USGA)
A golf green normally includes:
- The putting surface
- The cup or hole
- The flagstick
- Different slopes and contours
- One or more approved hole locations
- Closely maintained turf designed for consistent ball roll
The fringe, collar, or apron around the green may look similar, but it is usually part of the general area rather than the putting green. That distinction matters because you cannot automatically lift and clean your ball when it rests on the fringe.
When Is a Ball Considered on the Green?
Your ball is on the putting green when any part of it touches the green.
For example, imagine that most of your ball sits on the fringe but a small part touches the edge of the putting surface. Under the Rules, that ball is on the green. You may mark it, lift it, clean it, and replace it.
Painted dots or lines may sometimes define a difficult-to-see green boundary. Check the course’s local rules when the edge is unclear.
Main Parts of a Golf Green
Understanding the different parts of the green helps you choose better shots and avoid rules mistakes.
Putting Surface
The putting surface is the closely cut grass where players normally use a putter. However, the Rules do not require you to use a putter.
You may use another conforming club when it makes sense. A wedge, hybrid, or fairway wood can sometimes help when the ball is against the fringe and a normal putting stroke is restricted.
Cup and Hole
The cup is installed below the surface and supports the flagstick. A standard golf hole is 4.25 inches in diameter.
For a ball to be holed, the entire ball must be below the level of the green’s surface and within the hole. A ball leaning against the flagstick is not always automatically holed. Its exact position matters.
Flagstick
The flagstick helps players see the hole location from a distance. Modern rules allow golfers to leave it in while putting.
There is no penalty simply because a putt played from the green strikes an unattended flagstick left in the hole. Golfers may choose to leave it in, have it attended, or remove it before playing.
Fringe or Collar
The fringe is the narrow ring of slightly longer grass surrounding many greens. It provides a transition between the putting surface and the approach or rough.
Because the fringe is generally not part of the green, different ball-lifting and relief rules may apply. You can still putt from it, but you cannot lift your ball simply because you prefer to clean it.
Green Complex
The term green complex refers to the green and the surrounding features that influence approach and recovery shots. These may include:
- Bunkers
- Rough
- Closely mown run-off areas
- Mounds
- Swales
- False fronts
- Water penalty areas
A well-designed green complex tests more than putting. It asks golfers to control approach-shot distance, trajectory, spin, and direction.


Why Golf Greens Play Differently
Two greens can look equally smooth but produce very different results. Their speed and firmness may change with weather, grass type, maintenance, traffic, and course design.
Green Speed
Green speed describes how far a ball rolls after being released under controlled conditions. It is commonly measured with a device called a Stimpmeter.
A faster green requires less force. A slower green requires a firmer stroke.
Fast does not automatically mean better. A good green should provide a smooth, predictable roll at a speed appropriate for its slopes, grass health, weather, and expected players.
The USGA explains that putting green speeds naturally fluctuate because of temperature, humidity, growth, moisture, mowing, rolling, and other maintenance decisions. (USGA)
Firmness
Firmness affects both approach shots and putts.
A firm green may cause an approach shot to bounce and release farther. A softer green usually accepts shots more easily and may show deeper ball marks.
Firmness can also affect putting. The ball may roll differently across soft footprints, repaired pitch marks, or wet areas.
Slope and Contours
Most greens are not flat. Designers use slopes to direct water, create strategic hole locations, and make putting more challenging.
Common contours include:
- Ridges: Raised areas separating different sections
- Swales: Shallow low areas
- Tiers: Distinct upper and lower levels
- False fronts: Slopes near the front that send weak shots back off the green
- Backstops: Slopes behind a target area that can help stop or redirect a ball
Large slopes affect the overall direction of a putt. Smaller slopes often influence the ball most as it slows near the hole.
Grain
Grain is the direction in which grass blades grow or lean. It can be more noticeable on certain warm-season grasses, especially Bermuda grass.
A putt with the grain may roll faster and look slightly shinier from the player’s viewpoint. A putt into the grain may roll slower and appear darker.
Grain matters, but beginners often overestimate it. Start with slope and speed. Consider grain only after identifying the larger influences.
Moisture and Weather
Wet greens usually play slower and softer. Dry greens often become faster and firmer.
Wind can also affect exposed greens, especially on longer putts. Morning dew, rainfall, heat, shade, and changing humidity may cause the same green to play differently throughout the day.
Common Putting Green Grass Types
Golf courses choose grass based on climate, water availability, maintenance resources, traffic, and desired playing characteristics.
| Grass type | Common climate | Typical characteristics | Golfer consideration |
|---|---|---|---|
| Creeping bentgrass | Cooler regions | Fine texture and smooth roll | Can become quick with close mowing |
| Bermuda grass | Warm regions | Durable and heat tolerant | Grain may noticeably affect putts |
| Poa annua | Mild or coastal climates | Can provide excellent surfaces | Seed heads may affect afternoon smoothness |
| Fine fescue | Cool, dry conditions | Lower-input option in suitable climates | Often firmer and less commonly used alone |
| Mixed turf | Transitional regions | Combines adaptable species | Ball roll may vary by season and growth |
No grass type is automatically superior. A healthy surface maintained appropriately for the local climate usually performs better than an unsuitable premium grass under stress.
How to Read a Golf Green
Reading a green means estimating the direction and speed needed to start the ball on a successful line.
The goal is not to identify every tiny imperfection. It is to recognize the strongest influences and make a committed stroke.
1. Study the Green Before You Reach It
Watch the overall land as you approach. Look for high points, low points, drainage areas, and major tiers.
The surrounding terrain can reveal slopes that are difficult to see while standing directly over the ball.
2. Check the Putt From Behind the Ball
Stand several feet behind your ball and imagine a line toward the hole.
Identify whether the putt generally rises, falls, moves left, or moves right. Start with the largest slope rather than searching for tiny breaks.
3. View the Low Side
When time allows, look from the lower side of the putt. This angle often makes the amount of side slope easier to see.
Do not delay play by walking around every short putt several times. Gather enough information to make a confident decision, then play.
4. Choose Speed Before Finalizing the Line
Line and speed work together.
A firm putt normally takes less break because it reaches the hole sooner. A softer putt spends more time slowing on the slope, so gravity has more opportunity to move it sideways.
5. Select a Starting Point
Do not aim vaguely at a wide area. Choose a specific starting point a short distance in front of the ball.
This could be:
- A slightly different grass shade
- A repaired mark
- A small blade of grass
- An imaginary point on your chosen line
Keep your attention on the intended start line without trying to manipulate the putter during the stroke.
6. Commit to the Read
Once you address the ball, trust your decision.
A doubtful or guided stroke often produces poor contact and inconsistent pace. Even a slightly incorrect read can produce a reasonable result when the ball starts on line with good speed.
Expert Tip: On unfamiliar greens, spend your first few holes learning speed rather than chasing perfect break. Watch every putt in your group, including putts that miss, because each roll provides information about slope and pace.
Important Rules on the Putting Green
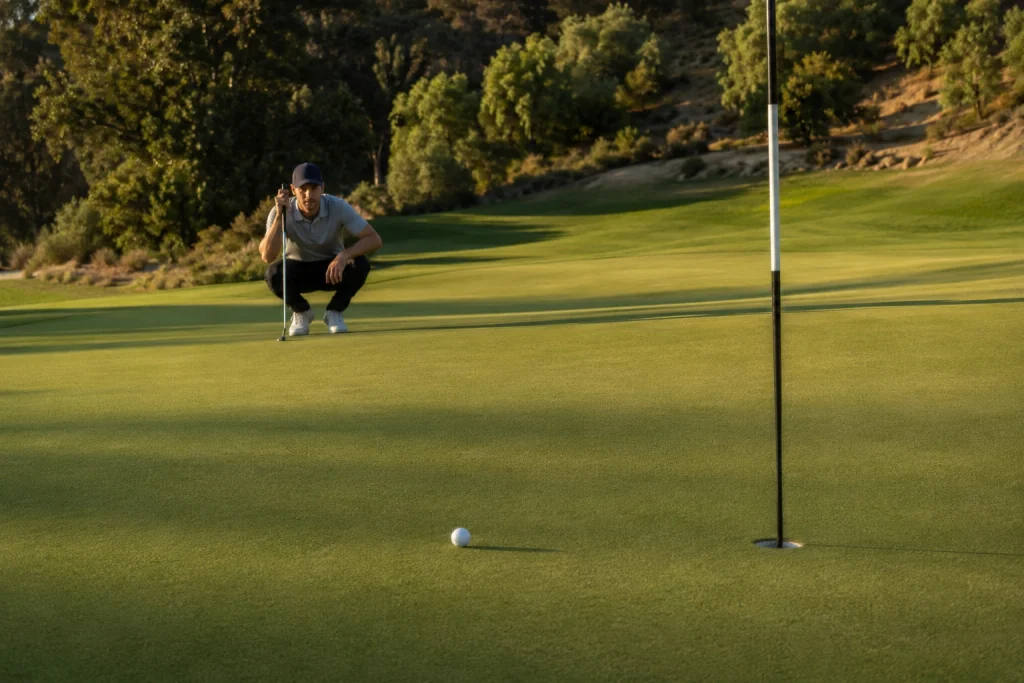
The putting green gives golfers special permissions, but those permissions still have limits.
Marking, Lifting, and Cleaning the Ball
You may mark, lift, and clean your ball when it is on the putting green.
Place a ball marker directly behind or beside the ball before lifting it. A coin, tee, or purpose-made marker is normally acceptable. Replace the ball on its original spot before playing.
Under the official procedures for marking and lifting a golf ball, lifting without first marking the spot can result in a one-stroke penalty. (USGA)
Repairing Damage
Golfers may repair many forms of damage on the green, including:
- Ball marks
- Shoe damage
- Scrapes caused by equipment
- Animal tracks
- Embedded objects
- Old hole plugs
- Damage to the edge of the hole
Use a normal repair tool, tee, club, hand, or foot. Restore the surface as closely as reasonably possible without delaying play.
You cannot create an unfairly improved path by altering healthy grass, removing natural surface imperfections, or making excessive repairs. The R&A’s Rule 13 guidance for putting greens explains what damage may be repaired and which improvements are not allowed. (R&A)
Removing Loose Impediments
You may remove loose natural objects such as leaves, twigs, stones, and detached grass.
Be careful not to move your ball while removing them. If the ball moves because of your actions, the applicable rule determines whether it must be replaced and whether a penalty applies.
Sand, Soil, and Dew
You may remove sand and loose soil from the putting green.
Dew, frost, and water are different. You generally cannot brush away dew or frost simply to improve your line. Temporary water may provide relief when it interferes with the lie, stance, or intended line of play under the applicable rule.
Playing From a Wrong Green
A wrong green is any putting green other than the green for the hole you are currently playing.
You must not play the ball as it lies from a wrong green. Take free relief at the nearest point that gives complete relief, following the correct dropping procedure.
This protects the closely maintained surface from damage caused by full swings, wedges, or divots.
Proper Golf Green Etiquette
Good etiquette protects the course and makes play more enjoyable for everyone.
Repair Your Ball Mark
Approach shots can leave dents in soft turf. Repair your own mark and another nearby mark when time permits.
Insert the repair tool around the outside of the mark and gently push the turf inward. Finish by tapping the area flat with your putter.
Do not lift the center upward. This can tear roots and leave a damaged patch that takes longer to heal.
Avoid Standing on Another Player’s Line
A player’s line extends from the ball toward the hole and slightly beyond it.
Avoid stepping close to that area when practical. Modern golf shoes cause less damage than older spikes, but footprints can still affect soft or wet greens.
Control the Flagstick Carefully
Do not drop the flagstick onto the putting surface. Lower it gently onto the fringe or hold it.
When replacing it, avoid damaging the edge of the hole. Do not use the flagstick to pull yourself up after retrieving the ball.
Keep Carts and Bags Away
Golf carts, push carts, and heavy golf bags can compact or damage green turf.
Follow course signs and keep equipment outside restricted areas. Never drive a golf cart onto a green unless the course has specifically authorized it for an accessibility need.
Be Ready Without Rushing Others
Read your putt while other players prepare, provided you do not distract them.
Once it is your turn, make your normal routine and play. Efficient preparation is better than rushing after the group has already begun waiting.
How Green Conditions Affect Club and Ball Choices
You do not need an expensive putter to handle normal green conditions. Consistent contact, predictable distance control, and confidence are more important than price.
Putter Considerations
A suitable putter should:
- Allow comfortable alignment
- Match your preferred visual shape
- Feel stable through impact
- Produce predictable distance
- Have a grip size that supports consistent hand pressure
Mallet putters often provide more stability on off-center strikes. Blade putters may offer a traditional appearance and different feedback. Neither design is automatically better for every player.
Golf Ball Considerations
Softer-feeling balls may give some players more feedback on short putts. Firmer balls may feel quicker off the face.
However, the ball’s construction has less effect than your stroke quality and pace control on most everyday putts. Choose a ball based on your complete game rather than putting feel alone.
Cost and Quality
A premium putter can offer refined materials, tighter manufacturing tolerances, and adjustable features. It cannot read the green or control speed for you.
A moderately priced putter that fits your setup may perform better than an expensive model with the wrong length, lie angle, head shape, or feel.
Spend based on fit and measurable improvement, not appearance or tour popularity.
Practice Drills for Better Green Performance
Distance Ladder Drill
Place markers at approximately 10, 20, 30, and 40 feet.
Putt one ball toward each distance without aiming at a hole. Try to stop every ball within a small target zone.
This develops pace control across changing distances.
Gate Drill
Place two tees slightly wider than your putter head and make strokes through the gate.
This helps identify whether the putter moves through impact without striking either tee.
Start-Line Drill
Create a second gate with two tees one or two feet in front of the ball. Make putts through the opening.
Start with a wide gate and narrow it as your accuracy improves.
Around-the-Hole Drill
Place balls three to six feet from the hole in a circle.
This exposes you to uphill, downhill, left-breaking, and right-breaking putts. Record how many you hole and repeat the drill regularly.
Common Mistakes Golfers Should Avoid
- Reading only from behind the hole: The most useful view often comes from behind the ball or from the low side.
- Ignoring speed: A correct line with poor pace rarely produces a good result.
- Taking too many practice strokes: Excessive rehearsals can create tension and slow the group.
- Trying to steer the putter: Choose the line before addressing the ball and make a committed stroke.
- Failing to mark the ball: Always mark its position before lifting it on the green.
- Repairing ball marks incorrectly: Push the edges inward instead of lifting the center.
- Standing too close to another player: Give golfers space and avoid their putting line.
- Assuming every green should be extremely fast: Smoothness, fairness, and turf health matter more than maximum speed.
- Buying a new putter before checking fundamentals: Poor aim, setup, and distance control are not always equipment problems.
- Practicing only short putts: Long-distance pace control is essential for avoiding three-putts.
When to Get Help From a Golf Pro or Fitter
Consider a lesson with a qualified golf professional when:
- You regularly start putts far left or right of your intended line
- Your contact location changes across the putter face
- Short putts create excessive anxiety or tension
- You frequently three-putt despite regular practice
- You cannot identify whether the problem is reading, aim, stroke, or speed
A professional can observe your setup, alignment, face control, and distance patterns. Even one focused putting lesson can give you more useful direction than repeatedly changing equipment.
A putter fitting may help when:
- The putter looks open or closed at address
- The length forces you into an uncomfortable posture
- Your eyes sit far inside or outside the intended line
- The head feels difficult to control
- You consistently strike the heel or toe
- You are considering an expensive replacement
Do not assume a fitting guarantees lower scores. A properly fitted putter supports a reliable motion, but improvement still requires practice and good green-reading habits.
FAQs
What is the difference between a golf green and a putting green?
There is no practical difference in normal golf language. “Putting green” is the official term for the prepared area containing the hole, while golfers commonly shorten it to “green.”
Can I lift and clean my golf ball on the green?
Yes. Mark its position first, lift and clean the ball, then replace it on the original spot. Lifting it without marking can result in a penalty.
Can I use a club other than a putter on the green?
Yes. The Rules do not require a putter. You may use any conforming club, although golfers should avoid strokes that could damage the putting surface.
Can I repair spike marks on my putting line?
Yes. Current rules allow reasonable repair of shoe damage and many other forms of putting green damage, provided you do not unreasonably delay play or create an unfair improvement.
Why are some golf greens faster than others?
Speed changes with grass type, mowing height, rolling, moisture, temperature, growth, wind, maintenance schedules, and turf health. Conditions can even change during the same round.
Should I leave the flagstick in when putting?
You may leave it in or remove it. Test both choices during practice and use the option that gives you the clearest target and greatest confidence.
How can a beginner improve green reading?
Begin by identifying whether the putt is uphill or downhill, then find the main side slope. Choose a starting point, match the line to your intended speed, and watch other balls for additional information.
Conclusion
A golf green is more than a short patch of grass surrounding the cup. Its speed, slope, firmness, moisture, grain, and design all affect how a ball rolls and how approach shots react.
The most useful lesson from this Golf Green Explained guide is to keep your approach simple. Read the largest slope first, choose a clear starting line, control your pace, and commit to the stroke. At the same time, mark your ball correctly, repair damage, respect other players’ lines, and protect the surface.
Before buying a new putter, practice distance control and check whether your setup fits your current equipment. When problems continue despite focused practice, book a putting lesson or professional fitting to identify the real cause and make a smarter improvement decision.