
Video Swing Analysis: How to Analyze Your Golf Swing on Camera

Quick Answer
Video swing analysis uses recorded golf swings to identify setup, movement, club-position, balance, and impact patterns that are difficult to feel at full speed. Record from face-on and down-the-line, compare one checkpoint at a time, connect what you see to ball flight, and use guidance from a qualified PGA golf professional when you cannot identify the true cause.
Quick Video Swing Analysis Steps
- Record two angles: Film one swing face-on and another down-the-line.
- Check setup first: Review alignment, posture, stance, ball position, and balance before moving parts.
- Find the first fault: Look for the earliest meaningful movement that differs from your intended pattern.
- Connect ball flight: Use start direction, curve, strike location, and turf contact as evidence.
- Change one thing: Rehearse one correction instead of rebuilding the entire swing.
- Record again: Compare the new motion with the original video under similar conditions.
Best Verification Tip
- Judge the video together with contact and ball flight. A swing that looks different is not automatically a swing that needs fixing.
Video swing analysis has become one of my favorite ways to make golf practice more objective. A phone camera can reveal movements that feel completely normal while you’re swinging.
Golf swing video analysis also helps separate a real mechanical problem from a bad guess. In this 2026 guide, I’ll show you how to record, review, diagnose, and practice without becoming obsessed with perfect positions.
In This Guide
What Is Video Swing Analysis in Golf?
Video swing analysis is the process of recording a golf swing and reviewing specific frames or movements to identify repeatable patterns. It gives you visual evidence that feel alone cannot provide.
The important word is patterns. One strange swing tells you much less than several swings showing the same problem.
Definition: Video swing analysis is a diagnostic method that uses recorded golf swings to evaluate setup, club movement, body motion, balance, impact tendencies, and the causes behind recurring ball-flight patterns.
Why does video help golfers?
A golf swing happens too quickly for most players to accurately feel every movement. Your brain also becomes familiar with your normal motion, even when that motion includes a compensation.
Video gives you an external reference. That’s useful when your feel and your actual movement don’t match.
- Setup: See posture, stance, alignment, and ball position.
- Takeaway: Check how the club starts moving.
- Backswing: Review turn, balance, arm structure, and club direction.
- Transition: Identify rushing or large rerouting moves.
- Impact area: Study delivery tendencies without forcing a frozen pose.
- Finish: Evaluate rotation and balance after the strike.
What video analysis cannot tell you by itself
A camera does not measure everything happening between the club and ball. Two swings can look similar while producing different strike locations or clubface conditions.
That’s why I never like diagnosing from appearance alone. The video needs context from the shot itself.
- Where did the ball start?
- Which direction did it curve?
- Where did the club strike the face?
- Where did the club contact the ground?
- Was the shot struck solidly?
Golf also allows successful swings to look different. A useful motion does not need to resemble a tour player’s swing frame for frame.
Section Takeaway: Video swing analysis should explain your ball-striking pattern, not simply make your swing look prettier.
How Should You Record Your Golf Swing?
Record from consistent face-on and down-the-line views whenever possible. Camera position matters because a poor angle can make a sound movement appear faulty.
You don’t need an expensive launch monitor to begin. A smartphone, stable support, and repeatable camera location can provide useful feedback.
Down-the-line vs. face-on video
| Camera View | Best For Checking | Common Limitation |
|---|---|---|
| Down-the-line | Alignment, posture, takeaway direction, swing plane appearance, club path tendencies, balance | Poor camera alignment can distort apparent club direction |
| Face-on | Ball position, stance width, body turn, pressure movement, backswing length, finish | It provides less information about apparent depth and target-line movement |
How to set up a down-the-line camera
Position the camera behind the golfer while keeping the lens level and stable. Use the same reference whenever you compare recordings.
Avoid placing the phone dramatically left or right between sessions. Small angle changes can make club and body positions appear different.
- Choose a safe location: Keep the phone and tripod outside the swing area.
- Stabilize the camera: Avoid handheld recording when comparing positions.
- Show the whole swing: Keep the clubhead, feet, hands, and top of the backswing visible.
- Include the target line: Give yourself enough background information to judge alignment.
- Repeat the angle: Use the same position when filming future sessions.
How to set up a face-on camera
Place the camera across from the golfer rather than far toward the target or trailing side. The goal is a clear view of the stance and body movement.
Keep enough space in the frame to see the entire club. A tight crop can hide important information at the top and finish.
What recording settings should you use?
Use the highest practical frame rate your phone supports while maintaining a clear image. Slow-motion recording can make fast club movements easier to review.
- Lighting: Keep the golfer well lit enough to distinguish the club and body.
- Shutter clarity: Brighter outdoor conditions often make individual frames easier to inspect.
- Resolution: Use enough resolution to see the clubface area and body references clearly.
- Slow motion: Use it for inspection, but also watch the swing at normal speed.
Normal-speed video matters because tempo can disappear when everything is viewed slowly. A technically interesting frame may belong to a swing with poor rhythm.
Pro tip: If you’re unsure whether your camera angle is creating a misleading picture, ask a certified instructor to check the recording setup before changing your mechanics.
Section Takeaway: Consistency matters more than fancy equipment. Record from repeatable angles so you’re comparing the swing rather than the camera position.
What Should You Look for in a Swing Video?
Start with setup, then follow the swing in order. The earliest meaningful problem is often more useful than the most dramatic position you notice later.
I like to review the swing almost like a chain. If one link changes early, several later positions may simply be reactions.
1. Setup
Setup is the easiest checkpoint to verify because nothing is moving yet. Look at balance, posture, alignment, stance width, grip appearance, and ball position.
- Posture: Are you balanced rather than reaching or sitting excessively?
- Alignment: Do the body and clubface match your intended shot?
- Ball position: Is it appropriate for the club you’re hitting?
- Distance from ball: Do your arms hang naturally?
2. Takeaway
Watch the first part of the club’s movement. Extreme movement inside, outside, upward, or behind you can create extra work later.
Don’t search for a perfect line. Look for consistency and whether the takeaway connects logically with the shot you’re trying to hit.
3. Backswing
Review body turn, balance, arm movement, wrist organization, and backswing length together. Avoid judging one body part in isolation.
A longer backswing is not automatically better. Your useful length depends on mobility, speed, sequencing, and control.
4. Transition and downswing
Transition begins as the backswing changes direction. This is where many golfers notice steepening, early hand acceleration, loss of posture, or balance changes.
The question isn’t whether your downswing resembles a professional golfer. Ask whether you can return the club consistently without a large recovery move.
5. Impact area
Impact happens too quickly to manufacture reliably as a static pose. Use the video to understand tendencies, then confirm them with strike and ball flight.
- Iron shots: Note strike quality and where turf contact occurs relative to the ball.
- Driver: Check strike location on the face and starting direction.
- Balance: Watch whether your body remains organized through the strike.
- Clubface: Avoid drawing major conclusions from one blurry frame.
6. Finish
A balanced finish is an easy checkpoint. You should normally be able to complete a controlled full swing without stumbling or falling out of position.
Hold the finish for three seconds during practice. If you cannot, reduce effort and see whether control improves.
The broader rules and playing resources from the USGA and The R&A are also useful references as technical practice transfers back to normal golf.
Pro tip: Mobility and physical limitations can change what an effective position looks like. Don’t force your shoulders, hips, wrists, or back into a painful shape because it appears better on screen.
Section Takeaway: Review your swing from address to finish. Fixing the earliest important problem usually makes more sense than correcting every later compensation.


How Does Ball Flight Improve Video Diagnosis?
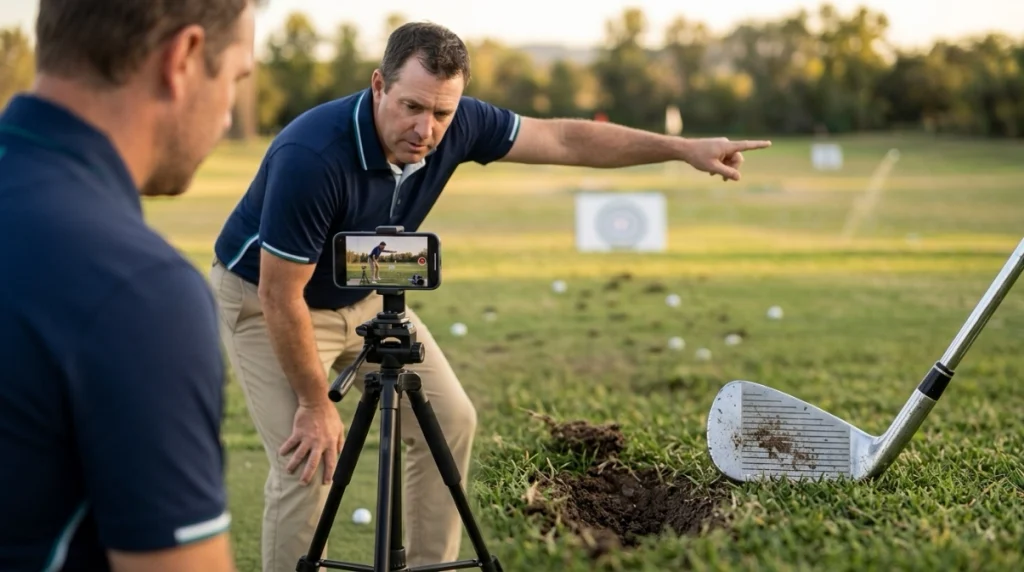
Ball flight gives your swing video a purpose. Without it, you can easily start correcting harmless movements because they look unusual.
Record the shot result beside the video whenever possible. Starting direction and curvature are especially useful clues.
Use four pieces of evidence
- Start direction: Did the ball begin left, right, or near your intended line?
- Curvature: Did it curve left, right, or remain relatively straight?
- Strike location: Was contact centered, toward the heel, or toward the toe?
- Ground contact: With irons, did the club contact turf before or after the ball?
A recurring push, for example, should first make you check aim and clubface-related evidence. Don’t immediately assume you need an entirely different swing path.
A pull also deserves an alignment check before a mechanical rebuild. Simple problems should receive simple tests first.
Why one shot is not enough
Golfers occasionally hit strange shots. One video therefore gives you a snapshot rather than a reliable diagnosis.
Film several normal swings without intentionally posing for the camera. Then look for movements that repeat alongside the same miss.
| Observed Pattern | Check First | Useful Evidence |
|---|---|---|
| Ball repeatedly starts right | Aim and face-delivery tendencies | Alignment video plus start direction |
| Ball repeatedly starts left | Aim and face-delivery tendencies | Target line plus start direction |
| Frequent heel contact | Setup distance and movement toward ball | Face spray or impact mark plus video |
| Iron contact occurs behind ball | Low-point and balance pattern | Turf mark plus face-on video |
The relationship matters more than the appearance. Your video should help explain why the same shot keeps appearing.
Section Takeaway: Never diagnose from video alone when ball-flight and strike evidence are available. The shot tells you whether the movement matters.
How Do You Analyze a Golf Swing Step by Step?
The simplest process is record, observe, identify, test, and compare. Resist the temptation to draw ten lines on the screen before you know what problem you’re solving.
Here’s the workflow I prefer when reviewing a practice session.
Step 1: Record your normal swing
Hit several ordinary shots before attempting a correction. Your first goal is capturing the swing you normally make.
Use the same club for a small group of shots. Changing clubs after every swing adds another variable.
Step 2: Write down the shot result
Label each recording with a simple result. You only need enough information to connect movement with outcome.
- Solid or poor strike
- Start left, center, or right
- Curve left, straight, or right
- Heel, center, or toe strike when known
Step 3: Watch once at full speed
Normal speed shows rhythm, balance, and the overall shape of the motion. Don’t begin by freezing every frame.
Ask one broad question: what stands out repeatedly?
Step 4: Review the swing in order
Move from address through the finish. Stop when you find the first meaningful difference that connects with your miss.
- Setup
- Takeaway
- Backswing
- Transition
- Downswing
- Impact evidence
- Finish
Step 5: Choose one priority
This is where analysis often goes wrong. A golfer notices five unusual positions and tries to fix all five in one range session.
Choose the earliest high-value issue. Ignore secondary positions until you know whether they remain after the first correction.
Step 6: Test at reduced speed
Make slow rehearsals before hitting another full shot. Then use half-swings or three-quarter swings to introduce the change.
This gives your body time to organize a movement that disappears too quickly at maximum speed.
Step 7: Record the new version
Film from the same location and use the same club when possible. Compare patterns rather than chasing a perfect screenshot.
If contact improves while the swing changes only slightly, that can still be meaningful progress.
Don’t compare yourself blindly with tour players
Professional swing footage can be useful for understanding concepts. It becomes less useful when you try to copy positions without considering grip, build, mobility, equipment, or shot shape.
For broader professional instruction and swing-analysis examples, Golf Digest maintains an extensive golf instruction library.
Pro tip: If you cannot identify which movement causes the miss, a certified instructor can save you from practicing the wrong correction for weeks.
Section Takeaway: Find the earliest repeatable fault that matches the ball-flight evidence. Work on one priority, then record again before adding another change.
How Do You Turn Swing Analysis Into Better Practice?
Analysis is useful only when it changes how you practice. Spending 30 minutes watching frames without hitting purposeful shots can become another form of procrastination.
I prefer short feedback cycles. Record enough to verify the change, then return attention to the golf ball and target.
Use a five-stage practice cycle
- Five rehearsals: Make the new movement slowly without a ball.
- Five half-swings: Hit easy shots while keeping the movement comfortable.
- Five three-quarter swings: Add speed only if contact remains predictable.
- Five normal swings: Record one or two for verification.
- Five target shots: Remove the technical rehearsal and play different targets.
The final stage is important. A swing change must eventually survive without constant camera feedback.
How often should you check video?
There is no need to inspect every ball. Recording constantly can make you react to harmless swing-to-swing variation.
Film enough swings to confirm the pattern. Then spend several shots practicing before checking again.
Separate practice mode from playing mode
Video analysis belongs mainly in practice. On the course, your attention should move toward the target, club selection, shot shape, and routine.
Carrying multiple mechanical checkpoints onto every tee can make a natural swing feel like a complicated test.
- Practice mode: Diagnose, rehearse, record, and measure.
- Transfer mode: Hit toward different targets with fewer technical thoughts.
- Playing mode: Choose the shot and commit to it.
Know when to stop self-analyzing
Self-analysis works best when the problem is clear and the correction produces measurable improvement. Stop when the video creates more questions than answers.
Persistent pain is another reason to seek qualified help. Never force a position simply because it looks more conventional on camera.
Pro tip: A certified teaching professional can combine video with ball flight, strike data, and in-person observation when a self-diagnosis keeps failing.
Section Takeaway: Use video in short feedback loops. Verify the movement, practice it, then gradually remove the camera and return to target-focused golf.
Video Swing Analysis FAQ
Can I analyze my golf swing with my phone?
Yes. A modern smartphone can provide useful face-on and down-the-line footage for checking setup, balance, swing direction, and repeatable movement patterns. Stable camera positioning matters more than owning expensive recording equipment.
What is the best camera angle for golf swing analysis?
Use both face-on and down-the-line when possible. Face-on is useful for ball position, body movement, and backswing length, while down-the-line provides another view of alignment, posture, club movement, and overall swing shape.
Should I use slow motion for golf swing analysis?
Slow motion is helpful for examining fast movements, but you should also watch the swing at normal speed. Full-speed playback reveals tempo, rhythm, balance, and movement relationships that can become difficult to appreciate frame by frame.
How many golf swings should I record?
Record several normal swings rather than diagnosing from one shot. Look for a movement that repeats alongside a recurring strike or ball-flight pattern. One unusual swing may simply be normal variation.
What should a beginner check first on swing video?
Start with setup. Check balance, posture, clubface aim, body alignment, stance, and ball position before analyzing complex moving positions. Fixing a starting-position error can remove compensations later in the swing.
Should my golf swing look like a professional golfer’s swing?
No. Professional golfers use different grips, backswing lengths, wrist patterns, tempos, and movement styles. Use elite swings to understand concepts rather than copying individual frames without considering your own body and ball flight.
Can video swing analysis make my golf swing too mechanical?
Yes. That usually happens when you monitor too many checkpoints during normal shots. Use video for diagnosis and verification, then simplify practice until you can hit toward a target without consciously controlling every position.
Video swing analysis works best when it makes golf simpler. Record from consistent angles, check setup first, find the earliest meaningful problem, and connect every change to strike quality and ball flight.
Use the camera as a feedback tool rather than a judge. When the change survives without the phone beside you, you’re turning analysis into a golf skill you can actually take onto the course.