
Red Penalty Area in Golf: Rules, Relief Options, and How to Drop Correctly

Quick Answer
A red penalty area in golf gives you three relief options under Rule 17, each costing one penalty stroke: stroke-and-distance relief, back-on-the-line relief, or lateral relief. The extra lateral option lets you drop within two club-lengths of where the ball last crossed the edge, no nearer the hole, as explained in the official Rule 17 penalty-area guidance.
Your Main Options
- Play it as it lies: You may normally hit the ball from inside the red penalty area without adding a penalty stroke.
- Stroke and distance: Add one penalty stroke and play again from where your previous stroke was made.
- Back on the line: Add one stroke and drop behind the penalty area using the required reference line.
- Lateral relief: Add one stroke and drop within two club-lengths of the point where the ball last crossed the red edge.
- Check local rules: A Committee may provide another authorized option, such as a dropping zone or opposite-side relief under a Local Rule.
Before You Drop
- Identify where the ball last crossed the penalty-area edge, not where the ball finally stopped.
- Make sure your relief area is no nearer the hole than the required reference point.
Red penalty areas cause plenty of confusion because golfers often focus on where the ball landed instead of where it crossed the boundary. That one mistake can change the entire dropping procedure.
I use a simple memory aid: red adds lateral. Once you understand that idea, Rule 17 becomes much easier to apply during a round.
In This Guide
What Is a Red Penalty Area in Golf?
A red penalty area is an area of the course where Rule 17 applies and where red markings identify the type of penalty area. It can contain water, but a penalty area does not have to be filled with water.
Definition: A penalty area is a defined area where a golfer may normally play the ball as it lies or take specified relief for one penalty stroke. A red penalty area adds a lateral relief option that a yellow penalty area does not provide.
Courses usually identify these areas with red stakes, red painted lines, or both. The USGA penalty-area guidance explains the same red-versus-yellow distinction.
Where exactly does the penalty area begin?
If a painted red line defines the area, the line itself is part of the penalty area. Its outside edge determines the boundary.
When stakes alone define the area, the edge generally follows the line between the outside points of those stakes at ground level. The stakes themselves are inside the penalty area.
- Red painted line: The line is inside the penalty area.
- Red stakes: The stakes identify and may define the edge when no line is used.
- Physical feature: A Committee may define the edge using a clearly identified feature.
- Vertical boundary: The penalty-area edge extends upward and downward.
A ball is in the penalty area when any part of it lies in, touches, or is above that defined area. You do not need the entire ball to be across the boundary.
What if the area has no color marking?
Under the Rules, a penalty area whose color has not been specified by the Committee is treated as red. Local course markings and Local Rules should still be checked before you proceed.
That matters because red status gives you the lateral option. It can turn an awkward recovery into a straightforward two-club-length drop.
What Are Your Three Relief Options From a Red Penalty Area?
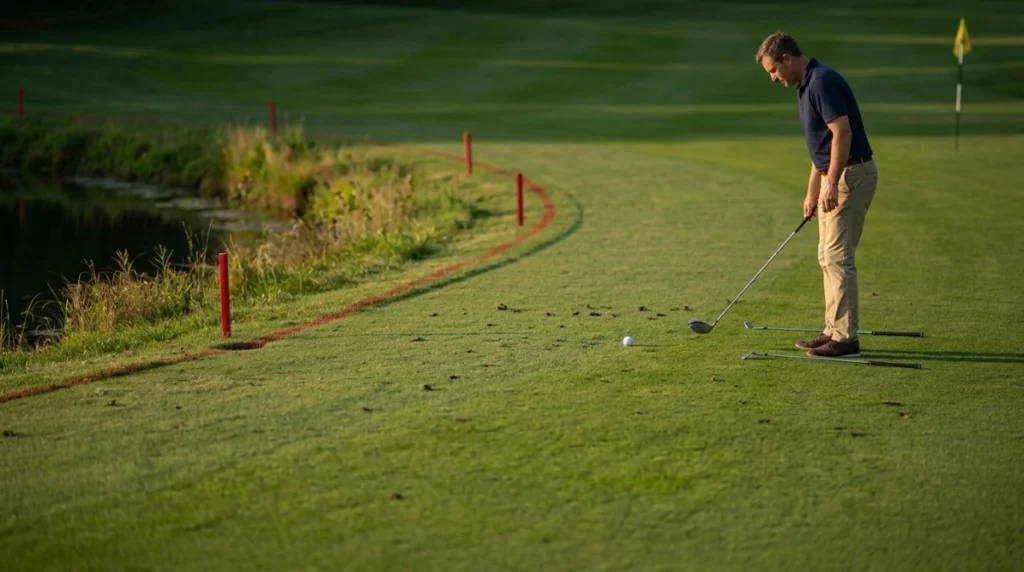
If your ball is in a red penalty area, you may normally play it as it lies or take relief. When you take Rule 17 penalty relief outside the area, each standard option costs one penalty stroke.
Option 1: Stroke-and-distance relief
You may add one penalty stroke and play from where your previous stroke was made. This option remains available even when another form of relief seems easier.
For example, imagine your approach from the fairway enters a red penalty area beside the green. You may return to the location of that previous stroke and proceed under stroke and distance.
- Penalty: One stroke.
- Reference: Where the previous stroke was made.
- Useful when: The crossing point offers a poor drop or difficult angle.
Option 2: Back-on-the-line relief
This option uses the point where the ball last crossed the penalty-area edge. Keep that crossing point between the hole and the location where you drop.
You may go as far back on that line as you want. Going farther back can sometimes create a better yardage or remove an awkward stance.
- Estimate where the ball last crossed the penalty-area edge.
- Visualize a line from the hole through that crossing point.
- Go back on that line outside the penalty area.
- Choose the required point on the line.
- Drop correctly within the resulting relief area.
Do not confuse the crossing point with the place where the ball splashed or stopped. Those can be several yards apart.
Option 3: Lateral relief
This is the option that makes a red penalty area different. You may drop within two club-lengths of where the ball last crossed the red edge.
The relief area cannot be nearer the hole than that reference point. The ball also cannot come to rest inside the same penalty area.
- Penalty: One stroke.
- Reference point: Where the ball last crossed the red edge.
- Relief-area size: Two club-lengths.
- Main restriction: No part of the permitted relief area may give you relief nearer the hole than allowed.
For most golfers, lateral relief is the quickest option when a shot enters a pond, creek, ditch, or native area running beside the hole. It often keeps play moving without forcing you far behind the hazard.
Section Takeaway: Red penalty relief normally costs one stroke, but you have three different ways to continue. The key extra benefit is lateral relief within two club-lengths of the last crossing point.
How Do You Take Lateral Relief Correctly?
Start by finding the best estimate of where your ball last crossed the penalty-area edge. That spot becomes the reference point for lateral relief.
Do not automatically walk to the ball’s final location. The Rules care about the crossing point.
Step 1: Identify the crossing point
Use what you, your playing partners, or other witnesses saw. Consider the ball’s flight, bounce, slope, and other reasonably available information.
If the ball has not been found, you need it to be known or virtually certain that the ball finished in the penalty area. That standard means at least a 95% level of certainty under the Rules.
Step 2: Measure two club-lengths
Measure from the crossing point using the longest club in your bag other than your putter. For most golfers, that means the driver.
The resulting lateral relief area extends up to two club-lengths from the reference point. It cannot include a location nearer the hole than that point.
Step 3: Drop from knee height
Under Rule 14.3, you must drop the ball yourself. Let it fall straight down from knee height without throwing, spinning, or rolling it.
The USGA’s official dropping guidance explains the procedure and how the ball must finish inside the relief area.
- Stand so you can drop straight down.
- Release the ball from knee height.
- Make sure it first strikes the ground in the relief area.
- Confirm that it comes to rest in the relief area.
- Redrop if Rule 14.3 requires it.
What if the ball rolls outside the relief area?
If a correctly dropped ball does not remain in the relief area, drop it a second time. If the second correct drop also fails to stay there, the placement procedure under Rule 14.3 may apply.
The important point is simple: a modern relief drop is not valid merely because the ball first landed in the right place. It also has to come to rest where the Rule requires.


Red vs. Yellow Penalty Area: What Changes?
Red and yellow penalty areas share two standard relief options. Red adds a third option: lateral relief.
| Rule Feature | Red Penalty Area | Yellow Penalty Area |
|---|---|---|
| Play ball as it lies | Yes, when permitted | Yes, when permitted |
| Stroke and distance | Yes — one penalty stroke | Yes — one penalty stroke |
| Back on the line | Yes — one penalty stroke | Yes — one penalty stroke |
| Lateral relief | Yes — two club-lengths | No standard lateral option |
| Standard relief choices | Three | Two |
The easiest way to remember the difference is: red gives you one extra sideways option. Everything starts with identifying the correct crossing point.
Courses often use red markings when the penalty area runs along the side of a hole. Yellow markings are commonly used where the challenge is more directly between the golfer and the target.
Can You Play the Ball From Inside a Red Penalty Area?
Yes. A ball in a red penalty area may normally be played as it lies without adding a penalty stroke.
You are not automatically required to take relief just because your ball crossed a red line. Sometimes playing it is the best option.
Can you ground your club?
Under the current Rules, a penalty area is not treated like the old water-hazard rules many golfers remember. You may normally ground your club and touch the ground or water while preparing for a stroke.
- You may normally make practice swings.
- You may normally ground the club behind the ball.
- You may remove loose impediments when the Rules allow it.
- You may move movable obstructions under the applicable Rules.
That does not give you permission to improve the conditions affecting your stroke in a prohibited way. Normal Rule 8 restrictions still matter.
Should you play it or take relief?
The rules decision and the strategy decision are different. A legal shot can still be a poor percentage play.
The PGA of America overview of penalty-area relief reinforces the basic Rule 17 choices golfers face.
- Play it: Consider this when you have a clean lie, stable stance, and clear exit.
- Take lateral relief: Consider it when nearby rough provides a safe recovery position.
- Go back on the line: Consider it when moving backward creates a better angle.
- Use stroke and distance: Consider it when the crossing point leaves no practical recovery.
My rule-of-thumb is to separate ego from the rules decision. Saving one penalty stroke is not useful if the next shot brings the same trouble back into play.
What Red Penalty Area Mistakes Should You Avoid?
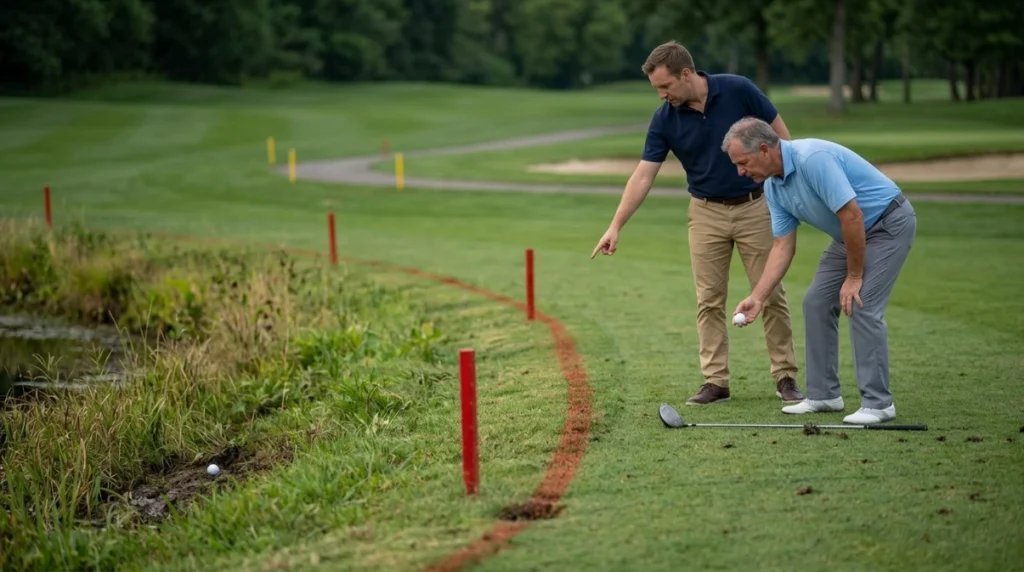
Most penalty-area errors are not caused by golfers misunderstanding the one-stroke penalty. They happen because the wrong reference point or relief area is used.
Mistake 1: Dropping beside where the ball finished
The lateral reference point is based on where the ball last crossed the edge. It is not automatically the nearest point beside the ball’s final location.
A ball can cross the edge, bounce forward, roll through water, and finish much farther down the penalty area. Your reference point still starts with the last crossing.
Mistake 2: Treating red and yellow markings the same
Both colors allow stroke-and-distance and back-on-the-line relief. Only red normally gives you the additional two-club-length lateral option.
- See red: think three options.
- See yellow: think two options.
- Unsure: check the course markings and Local Rules.
Mistake 3: Assuming a lost ball must be in the penalty area
You cannot use penalty-area relief simply because the area looks like the likely destination. If the ball is not found, it must be known or virtually certain that it came to rest there.
Under the Rules, that means the available evidence must make it at least 95% likely. If that standard is not met and the ball is lost, normal lost-ball rules apply.
Mistake 4: Dropping from shoulder height
That procedure belongs to older Rules. The current dropping procedure uses knee height.
You must release the ball correctly and have it finish within the required relief area. A casual toss beside the red stake is not a proper Rule 14.3 drop.
Mistake 5: Automatically crossing to the opposite side
Opposite-side relief is not one of the three standard red penalty-area options. The old automatic opposite-margin concept was removed from the standard Rules.
A Committee may adopt a Local Rule that allows opposite-side relief in specific circumstances. Check the scorecard or Local Rules sheet before using it.
Mistake 6: Forgetting about a no play zone
A Committee may define part or all of a penalty area as a no play zone. In that situation, you cannot simply decide to hit the ball from the prohibited area.
Follow the applicable Rule and course instructions instead. Green-topped stakes or other local markings may be used to identify such areas.
Section Takeaway: Find the correct crossing point before measuring anything. Then identify the relief option, add the required penalty stroke, and complete the drop under Rule 14.3.
Red Penalty Area FAQ
How many penalty strokes do you get for a red penalty area?
Taking standard relief from a red penalty area under Rule 17 normally adds one penalty stroke. You then continue using stroke and distance, back-on-the-line relief, or lateral relief.
How many club-lengths do you get from a red penalty area?
Lateral relief from a red penalty area provides a relief area measured two club-lengths from the point where the ball last crossed the edge. The permitted area cannot be nearer the hole than that reference point.
Can I drop on the other side of a red penalty area?
Not under the standard lateral-relief option simply because the opposite side looks better. Opposite-side relief is available only when an applicable Local Rule authorizes it.
Can I play a ball directly from a red penalty area?
Yes, in most cases you may play the ball as it lies without adding a penalty stroke. An exception can apply when a no play zone affects the ball or your intended stroke.
What if I cannot find my ball in the red penalty area?
You may use Rule 17 relief when it is known or virtually certain that the missing ball came to rest in the penalty area. The Rules use a standard of at least 95% likelihood.
Do I drop where the ball entered the water?
Use the point where the ball last crossed the defined edge of the penalty area. That may not be the same location where the ball splashed, landed, or finally stopped.
Do you drop from knee height for a red penalty area?
Yes. When the applicable relief procedure requires a drop, Rule 14.3 requires the player to release the ball correctly from knee height.
For a concise official explanation of the available choices, the USGA penalty-area relief FAQ confirms that red areas provide the two yellow-area options plus lateral relief.
The final takeaway is simple: when you see red, first find where the ball last crossed the edge. From there, decide whether playing it, going back on the line, taking lateral relief, or using stroke and distance gives you the safest legal way forward.
As of 2026, that “red adds lateral” memory aid remains one of the fastest ways to apply Rule 17 correctly. Check the course’s Local Rules whenever special dropping zones, no play zones, or alternative relief procedures are in effect.