Golf Swing Sequence: The Complete Step-by-Step Guide
Quick Answer
A good golf swing sequence moves from setup into takeaway, backswing, transition, downswing, impact, release, and a balanced finish. During the downswing, the lower body generally begins moving toward the target before the torso, arms, and club fully unwind, creating a coordinated chain rather than an arms-only hit. Studying slow-motion professional golf swing sequences can make this order easier to see.
Golf Swing Sequence in 8 Steps
- Set up: Build an athletic stance with balanced pressure, good posture, and correct alignment.
- Take the club away: Start smoothly while keeping the chest, arms, and club working together.
- Complete the backswing: Turn into your trail side without losing balance or forcing extra length.
- Start the transition: Allow pressure to move toward the lead side as the backswing finishes.
- Sequence the downswing: Let the pelvis and torso unwind while the arms and club follow.
- Reach impact: Deliver the clubface with rotation, balance, and control rather than trying to force the hit.
- Release naturally: Allow the arms and club to extend through the hitting area.
- Finish in balance: Keep rotating until your body faces the target and you can hold the finish.
Golf swing sequence sounds technical, but the idea is simple. Your body and club need to move in an organized order instead of everything firing at once.
I find sequence far more useful than obsessing over one frozen position. A well-timed swing can look different from player to player and still produce excellent contact.
In This Guide
What Is Golf Swing Sequence?
Golf swing sequence is the order and timing of movements that carry the club from address through impact and into the finish. It describes how your feet, pelvis, torso, arms, hands, and club coordinate during the motion.
Definition: Golf swing sequencing is the coordinated timing of body segments and the golf club throughout the swing, especially during the transition from backswing to downswing.
In biomechanics, coaches often discuss the kinematic sequence. This describes how rotational speed develops through body segments during the downswing.
Research on golf biomechanics commonly identifies a proximal-to-distal pattern. Movement progresses from larger central segments toward the arms and club, although researchers also note that exact timing varies among golfers and swing styles.
You can explore the scientific background in this biomechanical analysis of the golf swing.
That distinction matters. You don’t need to copy one professional golfer frame by frame.
Your goal is to create a sequence that lets each movement support the next one. Good sequencing helps you deliver the club without desperate corrections near impact.
- Sequence: The order in which movements happen.
- Tempo: The overall pace of the swing.
- Rhythm: How smoothly the parts of the swing flow together.
- Timing: When individual movements occur relative to one another.
A golfer can have fast tempo and still sequence the swing well. Another golfer can swing slowly but struggle because the arms, torso, and lower body are poorly coordinated.
What Are the Steps in a Golf Swing Sequence?

A full golf swing can be divided into eight useful stages. Thinking in stages makes diagnosis easier without turning the swing into eight separate mechanical moves.
1. Address and Setup
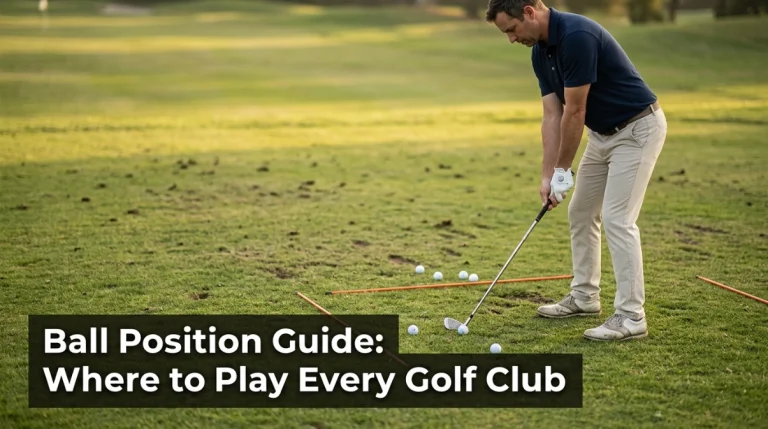
Sequence starts before the club moves. Your grip, posture, ball position, alignment, and balance influence everything that follows.
For a normal full swing, feel athletic rather than rigid. Let your arms hang naturally while keeping pressure balanced through your feet.
- Set your clubface toward the target.
- Align your body consistently.
- Bend forward from the hips.
- Keep modest knee flex.
- Stay balanced instead of sitting back on your heels.
2. Takeaway
The takeaway covers the first part of the backswing. The club should begin moving without an abrupt hand snatch or excessive lower-body slide.
I prefer to feel my chest, arms, and club starting together. That keeps the opening move quiet and gives me fewer positions to repair later.
A useful checkpoint comes when the shaft approaches parallel with the ground. At this point, you should still feel balanced and capable of completing your turn.
3. Backswing
The backswing continues as your shoulders turn and the club travels toward the top. Pressure generally moves more into the trail side without your entire body drifting away from the target.
Don’t chase a certain backswing length just because a tour player reaches it. Mobility, grip, arm structure, club choice, and individual anatomy all affect how the top looks.
- Turn: Let the upper body rotate rather than lifting only the arms.
- Stay centered: Avoid a large lateral sway away from the ball.
- Keep balance: Maintain usable pressure under your feet.
- Avoid forcing length: Stop when your turn has naturally completed.
4. Top of the Backswing
The top is not meant to be a long pause. It’s the brief change of direction between backswing and downswing.
This is where many golfers lose sequence. They finish the backswing and immediately throw the hands toward the ball.
Instead, the transition should blend the end of the backswing into the beginning of the downswing. Smooth doesn’t mean slow.
5. Transition
Transition is one of the most important parts of the golf swing. Pressure can begin moving toward the lead side while the club is completing its backswing.
That overlap is why good swings look fluid. The body isn’t waiting for every part to stop before the next part starts.
Pro tip: If transition changes cause pain, loss of balance, or confusion, work with a PGA-certified instructor who can assess your movement in person.
6. Downswing
During the downswing, the body begins unwinding toward the target. The arms and club respond to that motion rather than racing past the torso immediately.
Your objective isn’t to spin your hips as fast as possible. Excessive rotation without enough arm movement can leave the club trapped behind you.
7. Impact and Release
Impact is a moment inside the swing, not a position you should freeze into. The clubface, swing path, angle of attack, and strike location determine what the ball does.
After contact, let the arms extend and the club release naturally. Trying to manually flip the hands often creates inconsistent face control.
8. Follow-Through and Finish
Keep rotating after impact until your chest moves toward the target. Your trail heel can rise as pressure moves into the lead side.
A useful finish test is simple. If you can comfortably hold your finish for two or three seconds, your swing was probably reasonably balanced.
Section Takeaway: Treat the golf swing as one connected motion. Each stage should prepare the next stage instead of forcing you to make a last-second correction.
What Should Start the Golf Downswing?
The golf downswing generally begins with pressure moving toward the lead side and the lower body starting to unwind. The torso, arms, and club then continue through the hitting area in a coordinated sequence.
A simple model is pressure shift → pelvis → torso → arms → club. Don’t treat that model as a command to consciously fire five separate parts.
Golf Digest’s explanation of the downswing sequence describes a combination of shifting, rotating, and extending through the motion.
Pressure Starts Moving Forward
For a right-handed golfer, pressure begins moving toward the left side during transition. For a left-handed golfer, the direction reverses.
This isn’t the same as throwing your entire upper body toward the target. Your body still needs enough space to rotate and deliver the club.
The Pelvis Begins to Unwind
The pelvis starts turning toward the target as the downswing develops. This helps create room for the torso and arms.
The mistake is turning the pelvis as hard as possible from the top. If the arms cannot stay coordinated, the club may fall too far behind your body.
The Torso Follows
Your chest starts unwinding after the lower body begins changing direction. That creates the recognizable ground-up appearance seen in many accomplished swings.
The amount of separation varies. Mobility and swing style influence what is functional for each golfer.
The Arms and Club Accelerate
The arms move down while body rotation continues. Eventually the club accelerates rapidly through the bottom of the swing.
You don’t need to consciously hold wrist angles to create dramatic “lag.” Artificially dragging the handle can be just as damaging as releasing too early.
- Too much lower body: The arms can become stuck behind the torso.
- Too much upper body: The club may move steeply from the top.
- Too much hand action: Clubface control becomes difficult.
- Good coordination: Each part has enough time and space to contribute.
Section Takeaway: A lower-body-led downswing is useful only when the torso, arms, and club remain coordinated. Sequence matters more than simply trying to rotate faster.


Does the Swing Sequence Change With Different Clubs?
The basic sequence stays similar with drivers and irons, but setup and impact requirements change. Those differences can alter how the motion feels.
| Swing Element | Driver | Mid-Iron |
|---|---|---|
| Ball | Teed above the turf | Usually played directly from the turf |
| Ball position | Typically farther forward | Typically closer to the middle of the stance |
| Stance | Usually wider | Usually narrower than driver |
| Strike goal | Launch the teed ball efficiently | Strike the ball before the turf on a normal full shot |
| Basic sequence | Turn, transition, unwind, release | Turn, transition, unwind, release |
The biggest lesson is that you don’t need two completely different swings. Your setup and strike intention change more than the basic movement order.
Short wedges and partial shots can feel different because the swing is shorter. You still want the body and arms to remain coordinated rather than letting one part dominate.
What Golf Swing Sequence Mistakes Cause Poor Contact?
Most sequencing problems happen when one part of the body moves too early, too late, or too aggressively. The ball flight often reveals the compensation that follows.
- Starting down with the shoulders: This can send the club outward and steepen the downswing.
- Throwing the hands from the top: Early hand action can waste stored angles and make contact unpredictable.
- Spinning the hips open: Excessive early rotation can leave the arms behind the body.
- Sliding instead of turning: Too much lateral movement can make it difficult to control the bottom of the swing.
- Hanging on the trail side: Poor pressure movement can cause thin, heavy, or weak contact.
- Forcing a long backswing: Extra length can disrupt balance and make transition harder to organize.
- Stopping rotation at impact: The hands may flip to square the face when the body stalls.
Why an Arms-First Downswing Causes Trouble
Many golfers instinctively attack the ball with their hands because the club is what hits it. That reaction can cause the upper body to dominate before the lower body has created room.
The club may then approach from a poor direction. The golfer has only fractions of a second to rescue the shot.
Why Spinning the Hips Faster Isn’t Always Better
“Use your hips” is useful advice until it becomes exaggerated. The pelvis must work with the torso and arms, not outrun them completely.
When I see a swing feel worse after trying to rotate harder, I go back to a slower rehearsal. Coordination usually improves before speed does.
How Can You Improve Your Golf Swing Sequence?

The best sequencing drills slow the motion enough for you to feel the order. Start without a ball, then progress to short shots before hitting full-speed drivers.
Step-Through Drill
This drill exaggerates movement toward the target. It can help golfers who remain on the trail side too long.
- Address the ball with a short or mid-iron.
- Make a smooth backswing.
- Begin moving toward the lead side during transition.
- Swing through at moderate speed.
- Allow the trail foot to step toward the target after contact.
Start with practice swings before hitting balls. Keep the movement controlled.
Pause-at-the-Top Drill
A short pause can expose an arms-first transition. It gives you time to sense pressure moving before you rush the club downward.
- Make a three-quarter backswing.
- Pause briefly at the top.
- Feel pressure beginning to move toward the lead foot.
- Rotate and swing through smoothly.
This isn’t how you need to swing on the course. The pause is simply a training exaggeration.
Three-Pump Transition Rehearsal
This drill helps you rehearse the relationship between body rotation and the arms. Use slow motion at first.
- Make your backswing.
- Start down a short distance.
- Return near the top.
- Repeat the movement three times.
- On the final repetition, swing through to a balanced finish.
Half-Speed Swings
Half-speed swings are one of my favorite ways to clean up sequence. You can feel the transition instead of simply reacting to the ball.
Hit short shots at roughly comfortable practice speed. Focus on solid contact and balance rather than distance.
The PGA also highlights smooth transition and body coordination when discussing swing tempo and transition.
Hold-the-Finish Drill
Hit a controlled shot and hold your finish until the ball lands. You should feel stable over the lead side rather than falling backward or sideways.
A poor finish doesn’t identify the exact technical fault. It does tell you that balance and sequencing deserve attention.
Pro tip: A certified golf instructor can use video or launch-monitor feedback to separate a true sequencing problem from a grip, clubface, setup, or mobility issue.
Section Takeaway: Practice sequence slowly before adding speed. A repeatable order of movement usually produces more useful speed than trying to hit harder from the top.
Golf Swing Sequence FAQs
What is the correct sequence of a golf swing?
The basic golf swing sequence is setup, takeaway, backswing, transition, downswing, impact, release, and finish. During the downswing, pressure and lower-body movement generally begin toward the target before the torso, arms, and club complete their acceleration.
Should the hips or arms start the downswing?
The downswing should not begin with an aggressive arm throw. Pressure movement and lower-body rotation commonly begin the change of direction while the torso and arms remain coordinated with that motion.
Do the hips always move first in the downswing?
Not as a completely isolated action. Skilled golf swings contain overlapping movements, and exact timing differs among players, so thinking “hips first” too literally can cause excessive rotation.
What is the kinematic sequence in golf?
The kinematic sequence describes the timing of rotational speeds through body segments during the swing. Coaches often analyze the pelvis, torso, arms, and club to understand how movement and speed transfer through the downswing.
Why do I start my downswing with my arms?
Many golfers rush from the top because they are trying to create speed immediately. Slower transition rehearsals, half-swings, and pressure-shift drills can help the lower body and torso stay coordinated with the arms.
Does the driver have a different swing sequence from irons?
The fundamental sequence is similar. Driver setup normally uses a teed ball, wider stance, and farther-forward ball position, while an iron is usually played from the turf with a strike that contacts the ball before the ground.
How do I know if my golf swing sequence is wrong?
Possible signs include losing balance, throwing the club from the top, hanging on the trail side, severe inconsistency, or needing obvious hand corrections near impact. Video and professional instruction can help identify whether sequence is truly the root cause.
Final Takeaway: Don’t try to manufacture eight separate positions during your golf swing. Build a balanced setup, turn smoothly, transition toward the lead side, let the body and arms unwind together, and finish in control.
Start with slow rehearsals and half-swings. Once the sequence feels natural, gradually add speed while keeping the same balance and rhythm.