
Grip Drill 2: The Split-Grip Drill for Better Club Control

Quick Answer
Grip Drill 2 is a split-grip practice drill where you move your trail hand lower on the club. The extra space between your hands helps you feel the clubface, release, arm rotation, and body turn more clearly. It works best with slow practice swings before you return to your normal grip. You can also use PGA grip-pressure guidance to keep excess hand tension from getting in the way.
How to do Grip Drill 2
- Choose a short club: Start with a wedge, 7-iron, or 8-iron rather than a driver.
- Set your lead hand: Place it in its normal position near the top of the grip.
- Lower the trail hand: Move it a few inches down so there is a clear gap between your hands.
- Swing slowly: Begin with waist-high or half swings instead of full-speed shots.
- Feel the release: Notice how your arms, wrists, and body must work together.
- Return to normal: Rebuild your regular grip and reproduce the same motion.
Best practice tip
- Use the drill to learn a feeling, not as a permanent replacement for your normal golf grip.
If someone tells you to try Grip Drill 2, they usually mean a separated-hands or split-grip drill. The name can vary between instructors, but the basic idea is simple.
You separate your hands so the club exaggerates movements that are hard to notice with a normal grip. That makes this one of my favorite ways to simplify a confusing swing problem.
In This Guide
What Is Grip Drill 2 in Golf?
Grip Drill 2 is a split-hand golf drill. Your lead hand stays near its normal position while the trail hand slides lower on the grip or shaft.
Definition: A split grip is a practice grip that creates a deliberate gap between the golfer’s hands. The separation exaggerates how the hands, arms, wrists, and club move during the swing.
This is not the grip I would suggest carrying onto the first tee. Think of it as a training tool that makes certain movements easier to feel.
- Lead hand: Stays near the top of the grip.
- Trail hand: Moves lower by several inches.
- Swing speed: Starts slow and controlled.
- Swing length: Usually begins with half swings.
- Main purpose: Improve awareness of release, rotation, and club control.
Different instructors use slightly different hand spacing. That is fine because the separation is there to create feedback, not to establish a new permanent measurement.
The split-hand drill demonstrated in Golf Digest uses the same basic idea. It has been used to work on takeaway position, downswing movement, and club shallowing.
Section Takeaway: Grip Drill 2 separates your hands to exaggerate the motion of the club. Use that feedback to improve your normal swing.
How Do You Do Grip Drill 2 Correctly?
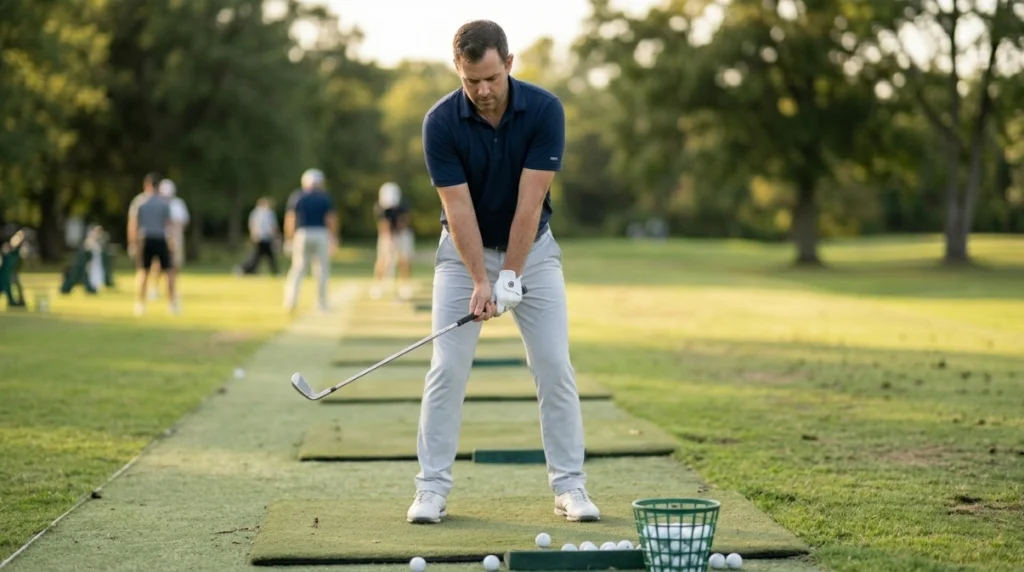
Start slowly with a short or mid-iron. Trying to hit a full driver immediately usually adds speed before you understand what the drill is teaching.
- Take your normal setup. Use your usual posture, ball position, and alignment.
- Place your lead hand normally. For a right-handed player, this is the left hand.
- Move your trail hand lower. Slide the right hand several inches down the grip or shaft.
- Make a small rehearsal. Swing from about waist high to waist high.
- Watch your tension. Keep the club secure without squeezing it hard.
- Make a half swing. Let the chest, arms, and club move together.
- Add a golf ball. Hit an easy shot only after the rehearsal feels controlled.
- Return to your normal grip. Try to keep the same release and body motion.
What should the drill feel like?
The club will probably feel unusual at first. That is part of the drill.
You should become more aware of your trail arm, lead arm, and clubhead. You may also notice that excessive wrist action becomes harder to hide.
- Feel both arms working with your chest.
- Let the club move rather than forcing it.
- Keep your forearms free of unnecessary tension.
- Finish in balance.
I like to think of the hands as guides rather than separate engines. The goal is a coordinated motion, not an aggressive flip through impact.
How far apart should your hands be?
There is no single required distance for a practice drill. Published versions range from a small gap to several inches of separation.
Start with a modest gap. Increase it only when you need stronger feedback from the drill.
Pro tip: If the drill creates wrist, elbow, shoulder, or hand discomfort, stop. A PGA Professional or qualified golf instructor can check your grip and motion in person.
What Swing Problems Can Grip Drill 2 Help?
The drill can help you feel several common swing movements more clearly. It is most useful when poor hand and arm coordination is contributing to inconsistent shots.
1. An over-the-top downswing
Golfers who pull the club steeply across the ball often struggle to coordinate their arms with their turn. The split grip makes that pattern easier to notice.
Work slowly and notice where the club travels during the transition. Do not try to force the club behind you.
2. Poor release through impact
A golfer can drag the handle through impact and leave the clubface open. Another golfer can flip the wrists too early.
Grip Drill 2 exaggerates arm and hand motion, giving you clearer feedback about both extremes.
3. Excess hand tension
Strong grip pressure can spread tension into the forearms and shoulders. That can make a free swing harder to produce.
- Grip the club securely.
- Keep the forearms relatively soft.
- Make a small waggle before swinging.
- Reset if your hands tighten during the takeaway.
The PGA of America also uses a numbered grip-pressure exercise in its instruction, asking golfers to recognize the difference between maximum tension and a much softer hold.
4. Poor body and arm connection
Separating the hands can make an arms-only swing feel awkward. A coordinated chest turn tends to make the movement easier.
That does not mean you should lock your arms to your body. The goal is coordination, not stiffness.
Section Takeaway: Use Grip Drill 2 to expose a movement problem. Then transfer the improved feeling back to your normal grip.


Split Grip vs Normal Golf Grip: What Changes?
A normal grip is designed for playing golf, while the split grip is designed to create feedback. The two should serve different jobs in your practice.
| Feature | Normal Grip | Grip Drill 2 / Split Grip |
|---|---|---|
| Hand position | Hands together | Trail hand moved lower |
| Typical purpose | Playing shots | Movement feedback |
| Starting swing | Any normal shot | Slow half swings |
| Best focus | Ball flight and target | Release, rotation, and club awareness |
| Long-term use | Regular grip | Practice aid |
The exaggerated grip is valuable because mistakes become obvious. Once you put your hands back together, the movement feels less extreme.
Do not judge the drill by distance. A short, centered strike that teaches you the correct motion is more useful than a hard shot.
What Mistakes Should You Avoid With Grip Drill 2?
The biggest mistake is turning a feel drill into a distance test. Speed can hide the feedback you are trying to learn.
- Swinging too hard: Begin at half speed instead of chasing full clubhead speed.
- Separating the hands too far: Use only enough space to make the movement clear.
- Squeezing harder: The strange grip can make golfers tense their hands and arms.
- Flipping the trail hand: Do not force the clubface closed through impact.
- Ignoring body rotation: Let your torso participate rather than swinging only with your hands.
- Hitting too many drill shots: Alternate the drill with your normal grip.
- Changing several things at once: Pick one movement to monitor during each practice set.
Another mistake is expecting one drill to diagnose every slice, hook, or poor strike. Ball flight can come from several combinations of clubface and swing path.
If your pattern stays the same after careful practice, get another set of eyes on it. A qualified instructor can identify which movement needs attention.
The USGA Rules of Golf guidance on making a stroke is also useful if you experiment with unusual hand positions. A legal stroke must still freely swing the club without prohibited anchoring.
How Should You Practice Grip Drill 2?
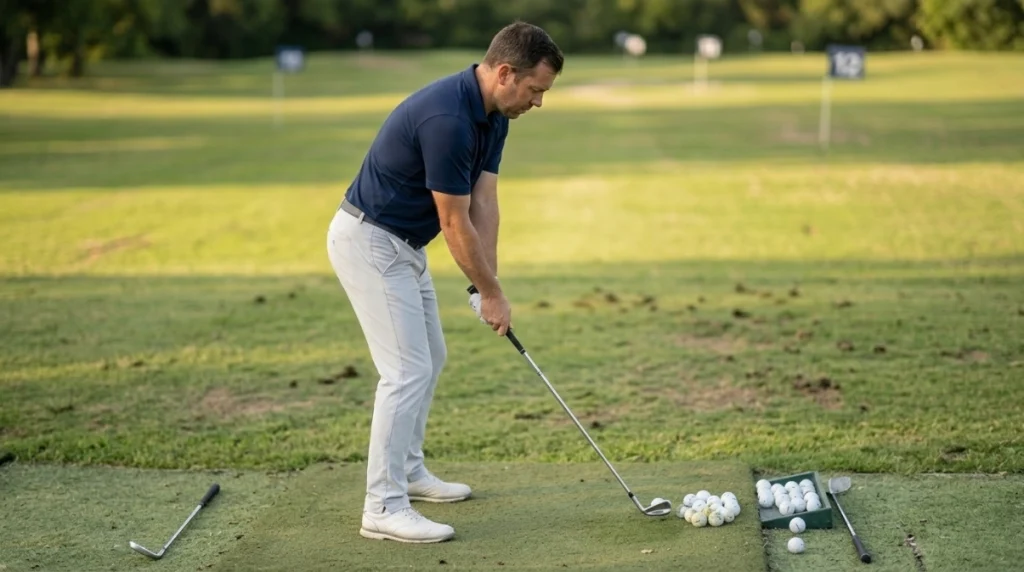
Short sets work better than mindless repetition. You want to transfer the feeling into your regular swing as soon as possible.
A simple 15-ball practice set
- Three rehearsals: Make slow split-grip swings without a ball.
- Three easy shots: Hit half shots using the split grip.
- Three normal shots: Put your hands together and copy the same motion.
- Three more drill shots: Return to the split grip if the old pattern comes back.
- Three target shots: Finish with your normal grip and a clear target.
For the first few swings, ignore distance. Pay attention to balance, contact, tension, and where the club seems to travel.
Then give yourself a target. Practice needs to reconnect with real golf eventually.
What should you measure?
A launch monitor can help, but you do not need one. Simple feedback is enough for most golfers.
- Did you strike the ball near the center of the face?
- Did the ball start closer to your intended line?
- Did your forearms stay relaxed?
- Did you finish in balance?
- Could you reproduce the feeling with your normal grip?
As of 2026, simple practice drills still have an important place beside launch monitors and swing video. Technology gives you numbers, while a drill can help you understand the movement behind them.
You can also review the R&A Rules resources when you want current official guidance on equipment and strokes.
Section Takeaway: Alternate split-grip swings with normal shots. The transfer back to your real swing is the part that matters.
Grip Drill 2 FAQs
What is Grip Drill 2?
Grip Drill 2 is a split-grip golf exercise. You keep the lead hand near its normal position and slide the trail hand lower to create space between your hands, which exaggerates club and arm movement.
Is the split grip supposed to be my permanent golf grip?
No. For most golfers, the split grip works best as a temporary practice drill. After several rehearsals or shots, return your hands to their normal position and try to reproduce the movement you learned.
Can Grip Drill 2 help a slice?
It may help when your slice involves poor release, an open clubface, or an over-the-top movement. However, slices have different causes, so use ball flight or professional instruction to confirm what your swing needs.
Can the drill help golfers who hook the ball?
It can provide useful feedback for golfers with overactive hands, but the goal changes. Instead of adding more hand rotation, focus on keeping the arms coordinated with your body turn through impact.
Which club should I use for Grip Drill 2?
A wedge or mid-iron is a sensible starting point because it is easier to control at reduced speed. Once the motion feels comfortable, you can experiment with longer clubs without immediately swinging at full speed.
How tight should I hold the club?
Hold it firmly enough that it will not slip, but avoid excessive tension in your hands and forearms. A small waggle before each swing can help you notice when your grip pressure has become too strong.
How often should I practice the drill?
A few short sets during a range session are usually enough. Alternate drill swings with normal shots so you learn to carry the improved movement into the grip you will use on the course.
Final takeaway: Grip Drill 2 works because it makes subtle movements easier to feel. Start slowly, separate the hands only enough to create clear feedback, and keep returning to your normal grip. The goal is not to master a strange practice swing. It is to make your regular swing simpler and more repeatable.
Try it during your next range session with one clear goal. Give yourself a few slow swings, transfer the feeling to your normal grip, and let the ball flight tell you what changed.