
Lead Hand Grip: How to Place Your Top Hand for Better Clubface Control

Quick Answer
A good lead hand grip places the handle mainly across the fingers, not deep in the palm. For a neutral starting position, wrap the lead hand over the handle so the thumb rests slightly to the trail-hand side of center and the hand can control the club without excess tension. PGA instruction also explains why grip position influences clubface control.
Lead Hand Grip Checkpoints
- Use the fingers: Let the handle run diagonally from near the little-finger side toward the index finger.
- Close the hand: Wrap the fingers first, then settle the heel pad over the handle.
- Check the thumb: Place it slightly off center rather than straight down the middle.
- Watch the knuckles: Around two visible knuckles is a useful neutral starting checkpoint for many golfers.
- Stay relaxed: Hold the club securely without squeezing hard enough to stiffen your wrists and forearms.
Before You Change It
- Make small grip changes and test them with short shots before taking the new position to a full swing.
The lead hand grip is one of the first things I check when my contact or starting direction feels inconsistent. Your lead hand is the left hand for a right-handed golfer and the right hand for a left-handed golfer.
The lead hand golf grip looks simple, but small changes can alter how comfortably the wrists hinge and how the clubface behaves. This guide shows you a neutral starting point, common variations, mistakes, and practical checks you can use at the range.
In This Guide
- What Is the Lead Hand Grip in Golf?
- How Should You Place Your Lead Hand on a Golf Club?
- Should Your Lead Hand Grip Be Strong, Neutral, or Weak?
- How Does the Lead Hand Grip Affect the Clubface?
- What Are the Most Common Lead Hand Grip Mistakes?
- How Can You Practice a Better Lead Hand Grip?
- Lead Hand Grip FAQ
What Is the Lead Hand Grip in Golf?
The lead hand grip is the position of your top hand on the club during a normal golf swing. It helps support the handle and plays an important role in how the clubface moves as you swing.
Definition: The lead hand is the hand closest to the end of the grip when both hands are on the club. For a right-handed golfer, that’s the left hand.
- Right-handed golfer: Left hand is the lead hand.
- Left-handed golfer: Right hand is the lead hand.
- Trail hand: The lower hand on the club.
I like to separate the terms grip position and club grip. Grip position describes what your hands do, while the club grip is the rubber or synthetic part installed on the shaft.
The USGA’s equipment rules for golf grips cover the physical grip fitted to the club. Your hand placement is a swing fundamental rather than an equipment specification.
Why the lead hand matters so much
Your hands are the direct connection between your body and the club. That makes the starting position of the lead hand worth checking before changing more complicated swing mechanics.
- It helps secure the club during the swing.
- It affects how freely the wrists can hinge.
- It can influence clubface orientation.
- It affects how much tension you feel in the hands and forearms.
- It gives the trail hand a better position to match.
That doesn’t mean one grip position fixes every slice or hook. Swing path, face angle, strike location, setup, and body motion still matter.
How Should You Place Your Lead Hand on a Golf Club?
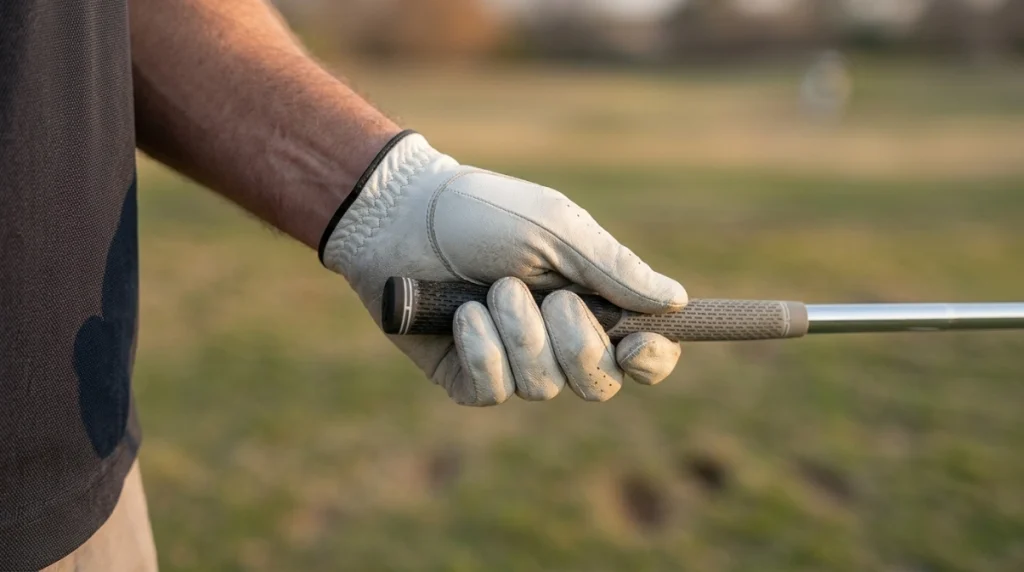
Start by placing the handle diagonally across the fingers of your lead hand. Then close your fingers around it and let the heel pad sit securely over the top of the handle.
This is the same general finger-based approach described in PGA instruction on finding the right golf grip. The goal is control without locking the wrist.
Step 1: Hold the club in front of you
Start with the club angled upward instead of resting it on the ground. I find this makes it easier to see exactly where the handle crosses my fingers.
Keep your lead hand open with the palm facing slightly inward.
Step 2: Set the handle across the fingers
Run the handle diagonally from near the base of the little finger toward the middle area of the index finger. Avoid pushing the entire handle deep into the center of your palm.
- Too much palm: Can make the wrist feel restricted.
- Too far into fingertips: Can make the club feel less secure.
- Diagonal placement: Gives the fingers and heel pad useful contact with the handle.
Step 3: Wrap the fingers first
Close your fingers around the handle before settling the thumb. The middle fingers should feel secure without needing a hard squeeze.
Next, let the fleshy heel pad near the little-finger side sit over the handle.
Step 4: Check the lead thumb
For a neutral starting position, the lead thumb usually rests slightly toward the trail-hand side of the grip’s center. It doesn’t need to sit perfectly straight down the shaft.
Your thumb and index finger form a small V shape. In a neutral setup, that V commonly points somewhere between your chin and trail shoulder rather than dramatically to either side.
Step 5: Look at your knuckles
When I want a simple visual checkpoint, I look down at the back of my lead hand. Seeing roughly two knuckles gives many golfers a useful neutral reference.
Knuckle count isn’t a rule. Hand shape, wrist anatomy, posture, and swing pattern can change what a functional grip looks like.
Pro tip: If you’re unsure whether your hand position matches your swing, ask a certified PGA or LPGA Professional to check it instead of forcing your wrist into an uncomfortable position.
Should Your Lead Hand Grip Be Strong, Neutral, or Weak?
A neutral grip is the simplest starting point for most golfers learning their hand position. A stronger or weaker grip describes rotation of the hand around the handle, not how tightly you squeeze it.
This terminology often causes confusion. Strong grip does not mean high grip pressure.
| Lead Hand Position | Typical Knuckle View | Hand Rotation | Common Tendency to Watch |
|---|---|---|---|
| Weak | About 0–1 | Rotated more toward the target side | May make an open face easier for some swing patterns |
| Neutral | About 2 | Moderately rotated | Useful baseline for evaluating normal ball flight |
| Strong | About 3 or more | Rotated farther toward the trail side | May make a more closed face easier for some swing patterns |
What a neutral grip gives you
A neutral position gives you a baseline. You can judge your ball flight from there instead of making a large hand change before knowing what your swing needs.
I prefer this approach because grip changes can feel strange even when they’re small.
When a stronger grip may help
A golfer who consistently leaves the clubface open may experiment with slightly more lead-hand rotation. The change should be gradual rather than moving immediately to an extreme position.
A stronger grip alone isn’t a guaranteed slice fix. An out-to-in path or poor strike can still send the ball right for a right-handed golfer.
When a weaker grip may help
A golfer who struggles with an excessively closed face may test slightly less lead-hand rotation. Again, ball flight should guide the adjustment.
Don’t change the grip simply because a professional player’s hand looks different. Their grip works together with their wrist motion, body rotation, and club delivery.


How Does the Lead Hand Grip Affect the Clubface?
The lead hand grip can influence how easily the clubface opens or closes during the swing. PGA coaching guidance treats grip position as an important match with the golfer’s overall motion.
This is why I check grip before chasing complicated swing fixes.
- Face starts too open: Check whether the lead hand has become unusually weak.
- Face closes too quickly: Check whether the lead hand has become much stronger than your normal position.
- Contact varies: Check whether your hand placement changes from shot to shot.
- Wrists feel restricted: Check whether the handle is sitting too deep in the palm.
Grip and swing path are different
Grip position can affect face behavior, but it doesn’t directly determine swing path. The club can still travel too far from outside to inside or inside to outside.
That’s important when diagnosing a slice or hook. You need to consider both face angle and path instead of blaming the grip for every curved shot.
Grip pressure matters too
Grip pressure means how tightly you hold the club. It is different from a strong or weak hand position.
I want the club secure enough that it won’t move in my hands, but relaxed enough that my wrists and forearms aren’t rigid. PGA guidance also emphasizes hand position, pressure, and proper grip size when building sound fundamentals through a reliable golf grip.
What Are the Most Common Lead Hand Grip Mistakes?
The most common problems I see in a grip check are simple. The golfer often changes hand position without noticing it.
- Handle buried in the palm: This can limit comfortable wrist movement.
- Excessive grip pressure: The hands, wrists, and forearms become tense.
- Thumb straight down by habit: This can hide an otherwise poor hand position.
- Extreme rotation: An unusually strong or weak grip may require compensations elsewhere.
- Changing every swing: Inconsistent placement makes ball-flight diagnosis much harder.
- Ignoring grip size: A handle that feels wrong in your hands may make a comfortable setup difficult.
Don’t copy knuckle count blindly
Two visible knuckles are a checkpoint, not a law. Some excellent players use stronger or weaker positions because those positions match their swings.
Your goal isn’t to make your hand look perfect in a photo. Your goal is a repeatable position that supports predictable clubface control.
Don’t squeeze harder to gain control
When the club feels unstable, the natural reaction is often to squeeze harder. That can create more tension without fixing the actual hand placement.
Check the handle position, grip condition, and grip size first.
How Can You Practice a Better Lead Hand Grip?
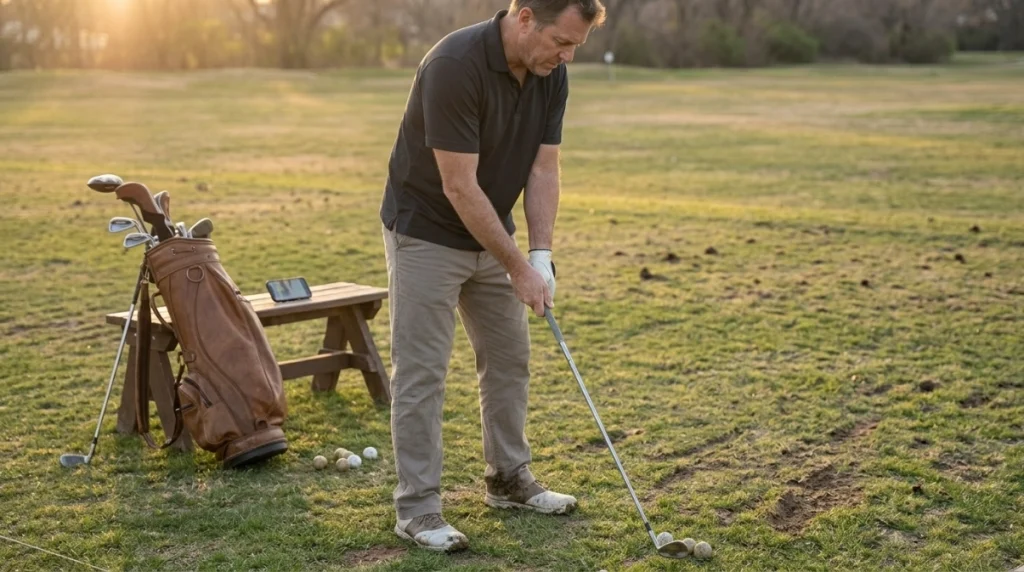
The best grip practice is simple and repeatable. I prefer doing several slow setups before hitting balls rather than changing my hand position during a full-speed swing.
Use the lead-hand setup drill
- Hold the club in front of your body.
- Open your lead hand.
- Place the handle diagonally across the fingers.
- Close the fingers around the handle.
- Set the heel pad over the top.
- Check your thumb and knuckle position.
- Remove the hand and repeat.
This teaches the setup without worrying about ball flight. After several repetitions, add the trail hand.
Hit short shots first
Test a grip change with small pitch shots or easy half swings before hitting a driver. Shorter swings make it easier to notice tension and face control.
- Start with a wedge or short iron.
- Make easy waist-high swings.
- Watch starting direction and curvature.
- Check the grip again after each few shots.
- Move to longer clubs only after the position feels repeatable.
Mark your normal reference
Take a photo of your lead hand from your normal address position. It gives you a reference when your grip starts feeling different later.
I especially like this check after a break from golf. Your grip can drift without feeling obviously different.
As of 2026, the basic lesson hasn’t changed: build your swing on repeatable fundamentals before chasing complicated fixes. Grip, alignment, posture, and setup still deserve regular checks.
Pro tip: If a new grip creates wrist, hand, or forearm discomfort, stop forcing the position and have a PGA or LPGA Professional check your setup.
Lead Hand Grip FAQ
How many knuckles should I see on my lead hand grip?
About two visible knuckles is a useful neutral starting point for many golfers. It isn’t a strict rule because hand shape, posture, wrist position, and swing style can change the appearance of a functional grip.
Should the golf club sit in the fingers or palm of the lead hand?
The handle should generally run diagonally across the fingers, with the heel pad helping secure it from above. Placing the club too deeply through the center of the palm can make comfortable wrist movement harder.
Where should my lead thumb go on the golf grip?
For a neutral starting position, let the lead thumb rest slightly toward the trail-hand side of the grip’s center. Avoid forcing it into a position that creates wrist tension or feels anatomically uncomfortable.
Does a strong lead hand grip mean squeezing harder?
No. A strong grip refers to rotating the hand farther around the handle toward the trail side. Grip pressure describes how tightly you squeeze the club, so the two terms mean different things.
Can a stronger lead hand grip fix a slice?
It may help some golfers who consistently deliver the clubface too open, but it isn’t a complete slice cure. Swing path, strike location, setup, and wrist motion also affect the ball’s starting direction and curve.
Can my lead hand grip be too strong?
Yes. If the lead hand rotates too far around the handle for your swing, you may struggle to manage the clubface without compensating elsewhere. Make small changes and judge them by contact and ball flight.
Should beginners use a neutral golf grip?
A neutral grip is a sensible starting point because it gives beginners a baseline before experimenting with stronger or weaker positions. From there, a coach can adjust the grip to fit the golfer’s natural wrist motion and swing.
Final takeaway: Start your lead hand grip with the handle diagonally across the fingers, a secure heel pad, moderate hand rotation, and relaxed pressure. Use that neutral position as a baseline, then let your ball flight and comfort tell you whether a small adjustment is needed.
If your grip keeps changing or you’re fighting the same shot shape, have a qualified PGA or LPGA Professional look at your hands before rebuilding the rest of your swing.