
Grip Mistakes: 10 Common Golf Grip Errors and How to Fix Them

Quick Answer
The most common grip mistakes are excessive pressure, incorrect hand position, poor thumb placement, and using the wrong grip size. These errors can open or close the clubface, restrict wrist movement, and make solid contact harder. Start with a neutral grip, then use the PGA’s professional coaching resources if your ball flight remains inconsistent.
Five Grip Checks to Make First
- Lower the pressure: Hold the club securely without squeezing tension into your forearms.
- Check the lead hand: See about two knuckles when looking down at a neutral grip.
- Match both hands: Keep the palms and thumb-index “V” shapes working in similar directions.
- Use your fingers: Place the handle mainly across the fingers instead of deep in the palms.
- Inspect the equipment: Replace slick grips and confirm that their size suits your hands.
How to Verify the Fix
- Hit waist-high shots before full swings and watch whether contact and starting direction become more predictable.
A small grip mistake can influence the clubface before the swing even starts. I’ve seen golfers rebuild their motion when a two-minute hand-position adjustment was the simpler answer.
This guide explains the most common golf grip errors, their ball-flight clues, and practical ways to correct them. It also covers grip styles, pressure, sizing, wear, and practice drills.
In This Guide
Why Does the Golf Grip Matter So Much?
Your grip connects your hands to the club and influences face control throughout the swing. A poor connection can produce compensations in your wrists, arms, shoulders, and release.
A golf grip is both the material handle installed on the shaft and the way your hands hold it. In this guide, “grip” usually means hand placement unless the equipment itself is being discussed.
Grip affects the clubface
The clubface has the greatest immediate influence on the ball’s starting direction. Hand placement affects whether that face returns square, open, or closed at impact.
- Open face: The ball may start right for a right-handed golfer and curve farther right.
- Closed face: The ball may start left or curve sharply left.
- Unstable face: The starting direction and curvature can change from shot to shot.
A grip change won’t repair every slice, hook, push, or pull. Swing path, strike location, alignment, and ball position also shape the result.
Grip affects speed and contact
Excessive hand tension can restrict wrist hinge and reduce the clubhead’s natural release. It often brings tension into the forearms before the takeaway.
When I test grip pressure, I begin with short iron shots at half speed. The correct pressure feels secure, yet the wrists remain responsive.
The goal isn’t to hold the club loosely. You need enough pressure to stop it from shifting during the swing.
Pro tip: Ask a certified PGA professional to check your grip if changes cause pain or make your ball flight less predictable.
What Are the Most Common Golf Grip Mistakes?
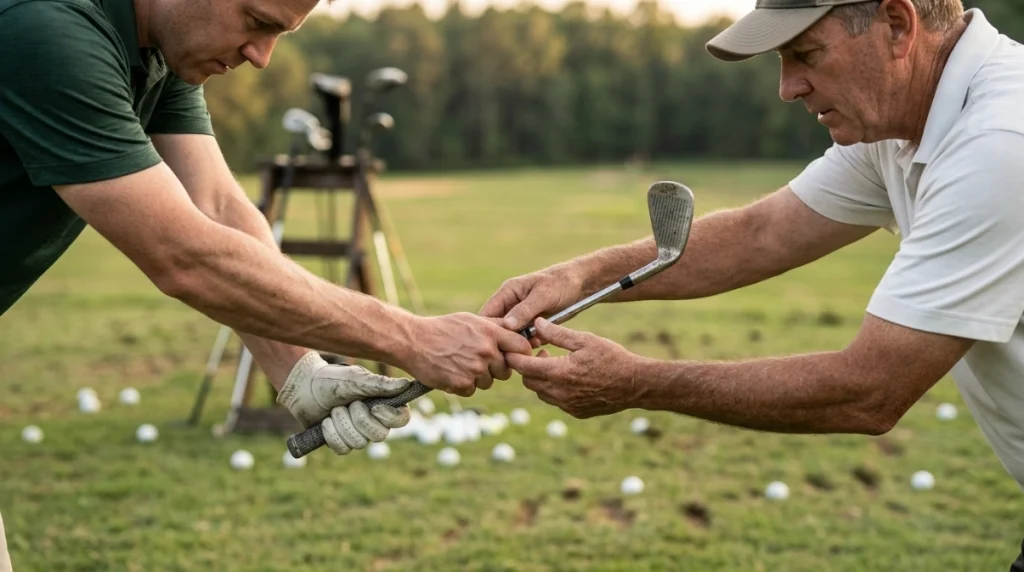
Most grip problems involve position, pressure, or poor coordination between the hands. Use your ball flight as evidence, but confirm the cause before changing anything.
1. Holding the club too tightly
A tight grip creates tension that can travel through your arms and shoulders. It may reduce speed, rhythm, and awareness of the clubhead.
On a scale from 1 to 10, start near 4 or 5. The club should feel controlled without making your forearms rigid.
2. Holding the club too loosely
Too little pressure lets the handle move during the swing. Golfers often respond by grabbing the club near impact, which disrupts timing.
Maintain steady pressure from address through the finish. Avoid a last-second squeeze during the downswing.
3. Placing the handle deep in the palms
A palm-heavy grip limits wrist mobility and can make the club feel difficult to release. This mistake often appears in the lead hand.
Run the handle diagonally across the base of the fingers. The heel pad of the lead hand should rest over the top of the handle.
4. Separating the hands
A visible gap between the hands can make them work independently. That separation weakens your control of the clubface.
Use an overlapping, interlocking, or ten-finger connection that keeps the hands together. No style works best for everyone.
5. Misplacing the thumbs
Golfers often press the lead thumb straight down the center or wrap the trail thumb too far underneath. Either position can reduce support and change wrist action.
- Lead thumb: Rest it slightly to the trail side of the shaft on a neutral grip.
- Trail thumb: Place it slightly to the lead side rather than directly on top.
- Trail index finger: Let it form a supportive trigger shape without pinching.
6. Letting the hands disagree
One hand may sit in a strong position while the other sits weak. The opposing forces make consistent face control difficult.
The “V” between each thumb and index finger should point in broadly similar directions. They don’t need perfect visual symmetry.
7. Choking the club at the very end
Placing the top hand against or beyond the end cap can reduce control. It may also accelerate wear in a golfer’s glove.
Leave a small part of the grip visible above the lead hand. Roughly one-quarter inch is a practical starting point.
8. Changing the grip during the swing
Some players begin with a sound grip but twist the club during the takeaway. Others regrip while waggling or immediately before starting.
Set your hands while the clubface points at the target. Once comfortable, keep that relationship stable.
9. Copying another player’s grip
A grip that suits one golfer may not suit another. Hand size, mobility, shot pattern, and swing matchups all matter.
Tour professionals also build swings around their individual grips. Copying one isolated detail can create a mismatch.
10. Ignoring worn or dirty grips
A slick surface encourages tighter pressure, especially in heat or rain. Dirt, sunscreen, and skin oils can reduce traction before the grip looks damaged.
Clean grips with mild soap and water, then dry them fully. Replace them when they become hard, cracked, smooth, or unreliable.
Section Takeaway: Build a connected, finger-based grip with steady pressure. Confirm each change through contact and starting direction.
Is Your Grip Too Strong, Too Weak, or Neutral?
“Strong” and “weak” describe hand rotation around the handle, not grip pressure. A strong grip rotates the hands toward the trail side, while a weak grip rotates them toward the lead side.
The descriptions below assume a right-handed golfer. Left-handed players should reverse the directions.
| Grip position | Address appearance | Possible tendency | Useful first check |
|---|---|---|---|
| Strong | Three or more lead-hand knuckles may show | Closed face, draw, hook, or low flight | Rotate both hands slightly toward neutral |
| Neutral | About two lead-hand knuckles may show | Balanced starting point for face control | Check that both hands work together |
| Weak | One or no lead-hand knuckles may show | Open face, fade, slice, or high flight | Rotate both hands slightly toward neutral |
These tendencies aren’t guarantees. A golfer can hook with a weak grip or slice with a strong one because swing path and strike still matter.
How to find a neutral starting position
- Hold the club in front of you with its face square.
- Place the lead-hand fingers diagonally under the handle.
- Close the lead hand so its heel pad sits on top.
- Add the trail hand without changing the clubface.
- Check that both “V” shapes point between your trail ear and shoulder.
Treat two visible knuckles as a reference, not an absolute rule. Your anatomy and preferred shot shape may require a modest variation.
As of 2026, the fundamentals remain unchanged despite new club and shaft technology. Start neutral, observe the flight, and adjust in small increments.

Which Golf Grip Style Should You Use?
The overlapping, interlocking, and ten-finger grips can all work. Choose the option that connects your hands without pain, strain, or unnecessary tension.
Overlapping grip
Place the trail-hand little finger over the gap between the lead index and middle fingers. This style often suits golfers with medium or large hands.
It creates a unified feeling without locking the fingers together. However, players with smaller hands may struggle to maintain contact.
Interlocking grip
Interlock the trail little finger with the lead index finger. Golfers with smaller hands often find this connection secure.
A common mistake is forcing the fingers too deeply together. That can create pressure points and push the palms apart.
Ten-finger grip
Place all ten fingers on the club without overlapping or interlocking them. Beginners, juniors, and golfers with limited hand strength may prefer this style.
The risk is allowing the hands to act separately. Keep them touching and moving as one unit.
- Choose overlap for a connected feel with less finger locking.
- Choose interlock when you need a compact, secure connection.
- Choose ten-finger when comfort and full-finger contact matter most.
Comfort should never mean uncontrolled movement. Test each style with small pitch shots before using it at driver speed.
Can Grip Size or Condition Cause Bad Shots?
Yes, grip size and surface condition can influence pressure, comfort, and hand action. They won’t dictate ball flight alone, but a poor fit can encourage compensations.
Signs your grips may be too small
- The fingertips dig deeply into the heel pad.
- You feel forced to squeeze the handle.
- Your hands seem overly active through impact.
- The club feels unstable despite firm pressure.
Signs your grips may be too large
- Your fingertips barely approach the palm.
- You struggle to close your hands comfortably.
- The handle feels difficult to release.
- Your wrists or forearms feel restricted.
Standard, midsize, jumbo, and undersize labels vary slightly between manufacturers. Extra tape layers can also change the finished diameter.
A club fitter can measure your hands and observe your hold. More importantly, the fitter can test whether a different size improves comfort and control.
When should golf grips be replaced?
There’s no universal replacement schedule because use, climate, storage, and material differ. Inspect the grips instead of relying only on time.
- Loss of texture: The original surface pattern feels polished or smooth.
- Hardening: Rubber feels firm and provides little traction.
- Visible damage: Cracks, splits, or worn thumb areas appear.
- Reduced confidence: You squeeze harder to stop the club from slipping.
The USGA Equipment Rules explain the specifications that conforming club grips must meet. Competition players should check unusual training or molded grips before using them during a round.
Section Takeaway: Grip size should support a natural hold, while the surface should remain clean and secure. Fit and condition matter more than a fixed replacement date.
How Do You Fix a Bad Golf Grip?
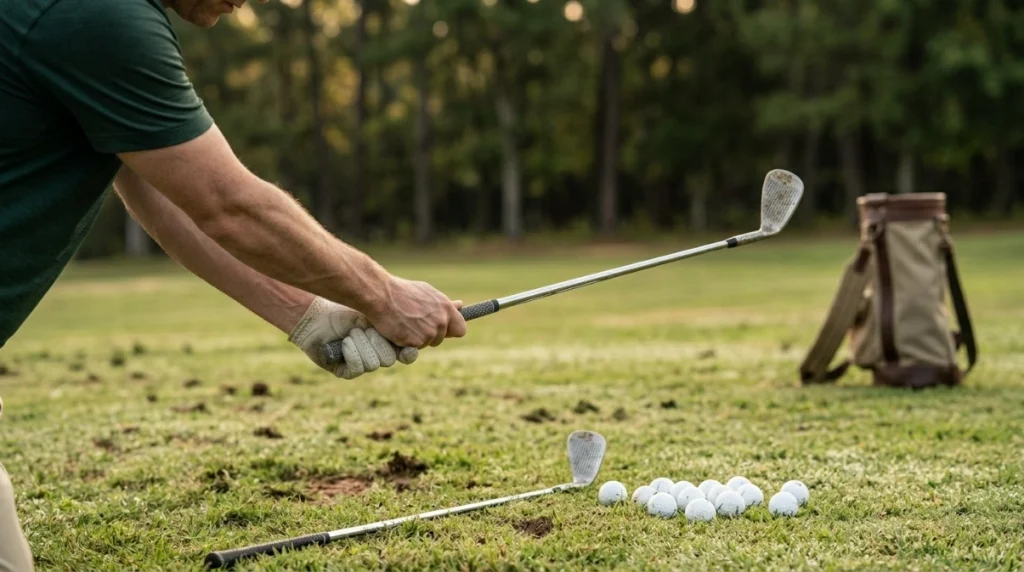
Change one element at a time and begin with slow shots. A grip correction can feel strange because your old position became familiar, not because it was effective.
Use this five-step reset
- Square the face: Rest the clubhead behind a ball and aim it at a clear target.
- Set the lead hand: Position the handle through the fingers with the heel pad on top.
- Add the trail hand: Cover the lead thumb and keep both palms coordinated.
- Reduce tension: Soften your forearms while maintaining control of the handle.
- Recheck the face: Confirm that it didn’t rotate while you placed your hands.
Practice with waist-high swings
Hit ten shots with a wedge using a backswing and finish near waist height. Focus on centered contact and starting direction rather than distance.
If the pattern improves, progress to three-quarter shots. Full-speed swings should come last.
Use a marker line for feedback
Draw a temporary reference line along the center of an old practice grip with a removable marker. Use it to notice whether your hands rotate between repetitions.
A mirror or phone recording can also reveal changes. Record from face-on and keep the camera far enough away to show both hands.
Separate grip errors from swing-path errors
A right-curving shot doesn’t automatically prove that your grip is weak. The club could also travel too far left through impact for a right-handed golfer.
Use this diagnosis order:
- Note where the ball starts.
- Observe which way it curves.
- Mark the clubface to check strike location.
- Confirm alignment and ball position.
- Change the grip only when the evidence supports it.
I once weakened my lead hand to stop a pull, but the ball began fading from the same leftward start. Alignment and path were the larger problems, so the grip change only added another variable.
The lesson was simple: don’t rebuild your hands after one poor shot. Look for a repeatable pattern across several clean strikes.
Pro tip: A certified instructor can measure clubface and swing-path data while checking your hands in person. Get professional guidance if self-correction creates conflicting misses.
For broader instruction standards and coaching information, visit the PGA Coach directory. A short fundamentals lesson can prevent weeks of practicing the wrong position.
Section Takeaway: Reset the grip at low speed, verify the ball-flight pattern, and change only one variable at a time.
Frequently Asked Questions
How do I know if my golf grip is wrong?
Your grip may need attention if the club slips, your forearms remain tense, or your starting direction changes unpredictably. Check hand position, pressure, grip condition, alignment, and strike location before deciding that the grip is the sole cause.
Can a bad grip cause a slice?
Yes. A weak or poorly coordinated grip can leave the clubface open to the swing path, producing a slice. However, an out-to-in swing path, heel strike, or poor alignment can create a similar result.
Can a strong golf grip cause a hook?
A strong grip may encourage the clubface to close faster, which can contribute to a hook. It isn’t the only cause, so check swing path and impact location before rotating both hands toward neutral.
How tightly should I hold a golf club?
Use enough pressure to keep the handle stable without making your forearms rigid. A starting pressure of 4 or 5 on a 10-point scale works for many golfers, but it must remain steady throughout the swing.
Should the golf club sit in my fingers or palms?
The handle should sit mainly across the fingers, especially in the lead hand. The lead-hand heel pad then rests over the handle, creating support without forcing the shaft deep into the palm.
How many knuckles should I see in a neutral golf grip?
Many right-handed golfers see about two knuckles on the lead hand when looking down. Treat that number as a starting reference because hand anatomy, posture, and preferred ball flight can change the ideal appearance.
Should I use the same grip for every golf club?
Your basic full-swing grip can remain consistent from wedges through the driver. Putting often uses a different style because it aims to control face rotation and doesn’t require the same wrist action as a full swing.
Correcting grip mistakes doesn’t require a complete swing rebuild. Start with neutral hand placement, moderate pressure, and a clean grip that fits your hands.
Test every adjustment with short shots before increasing speed. When contact and starting direction become predictable, you’ll know the change is helping.